Category Archives: Banners

Academy Awards 2016!!!


We love the Academy Awards and like to have a nice meal and dessert while watching the show. For this year’s awards celebration, we chose to highlight walnuts and strawberries throughout our meal. Hope you enjoy this unique brie cheese appetizer, our salad entrée, and strawberry shortcake ice cream cake. Also offered are an easy Academy Award banner idea, a plant update and, of course, the bears!

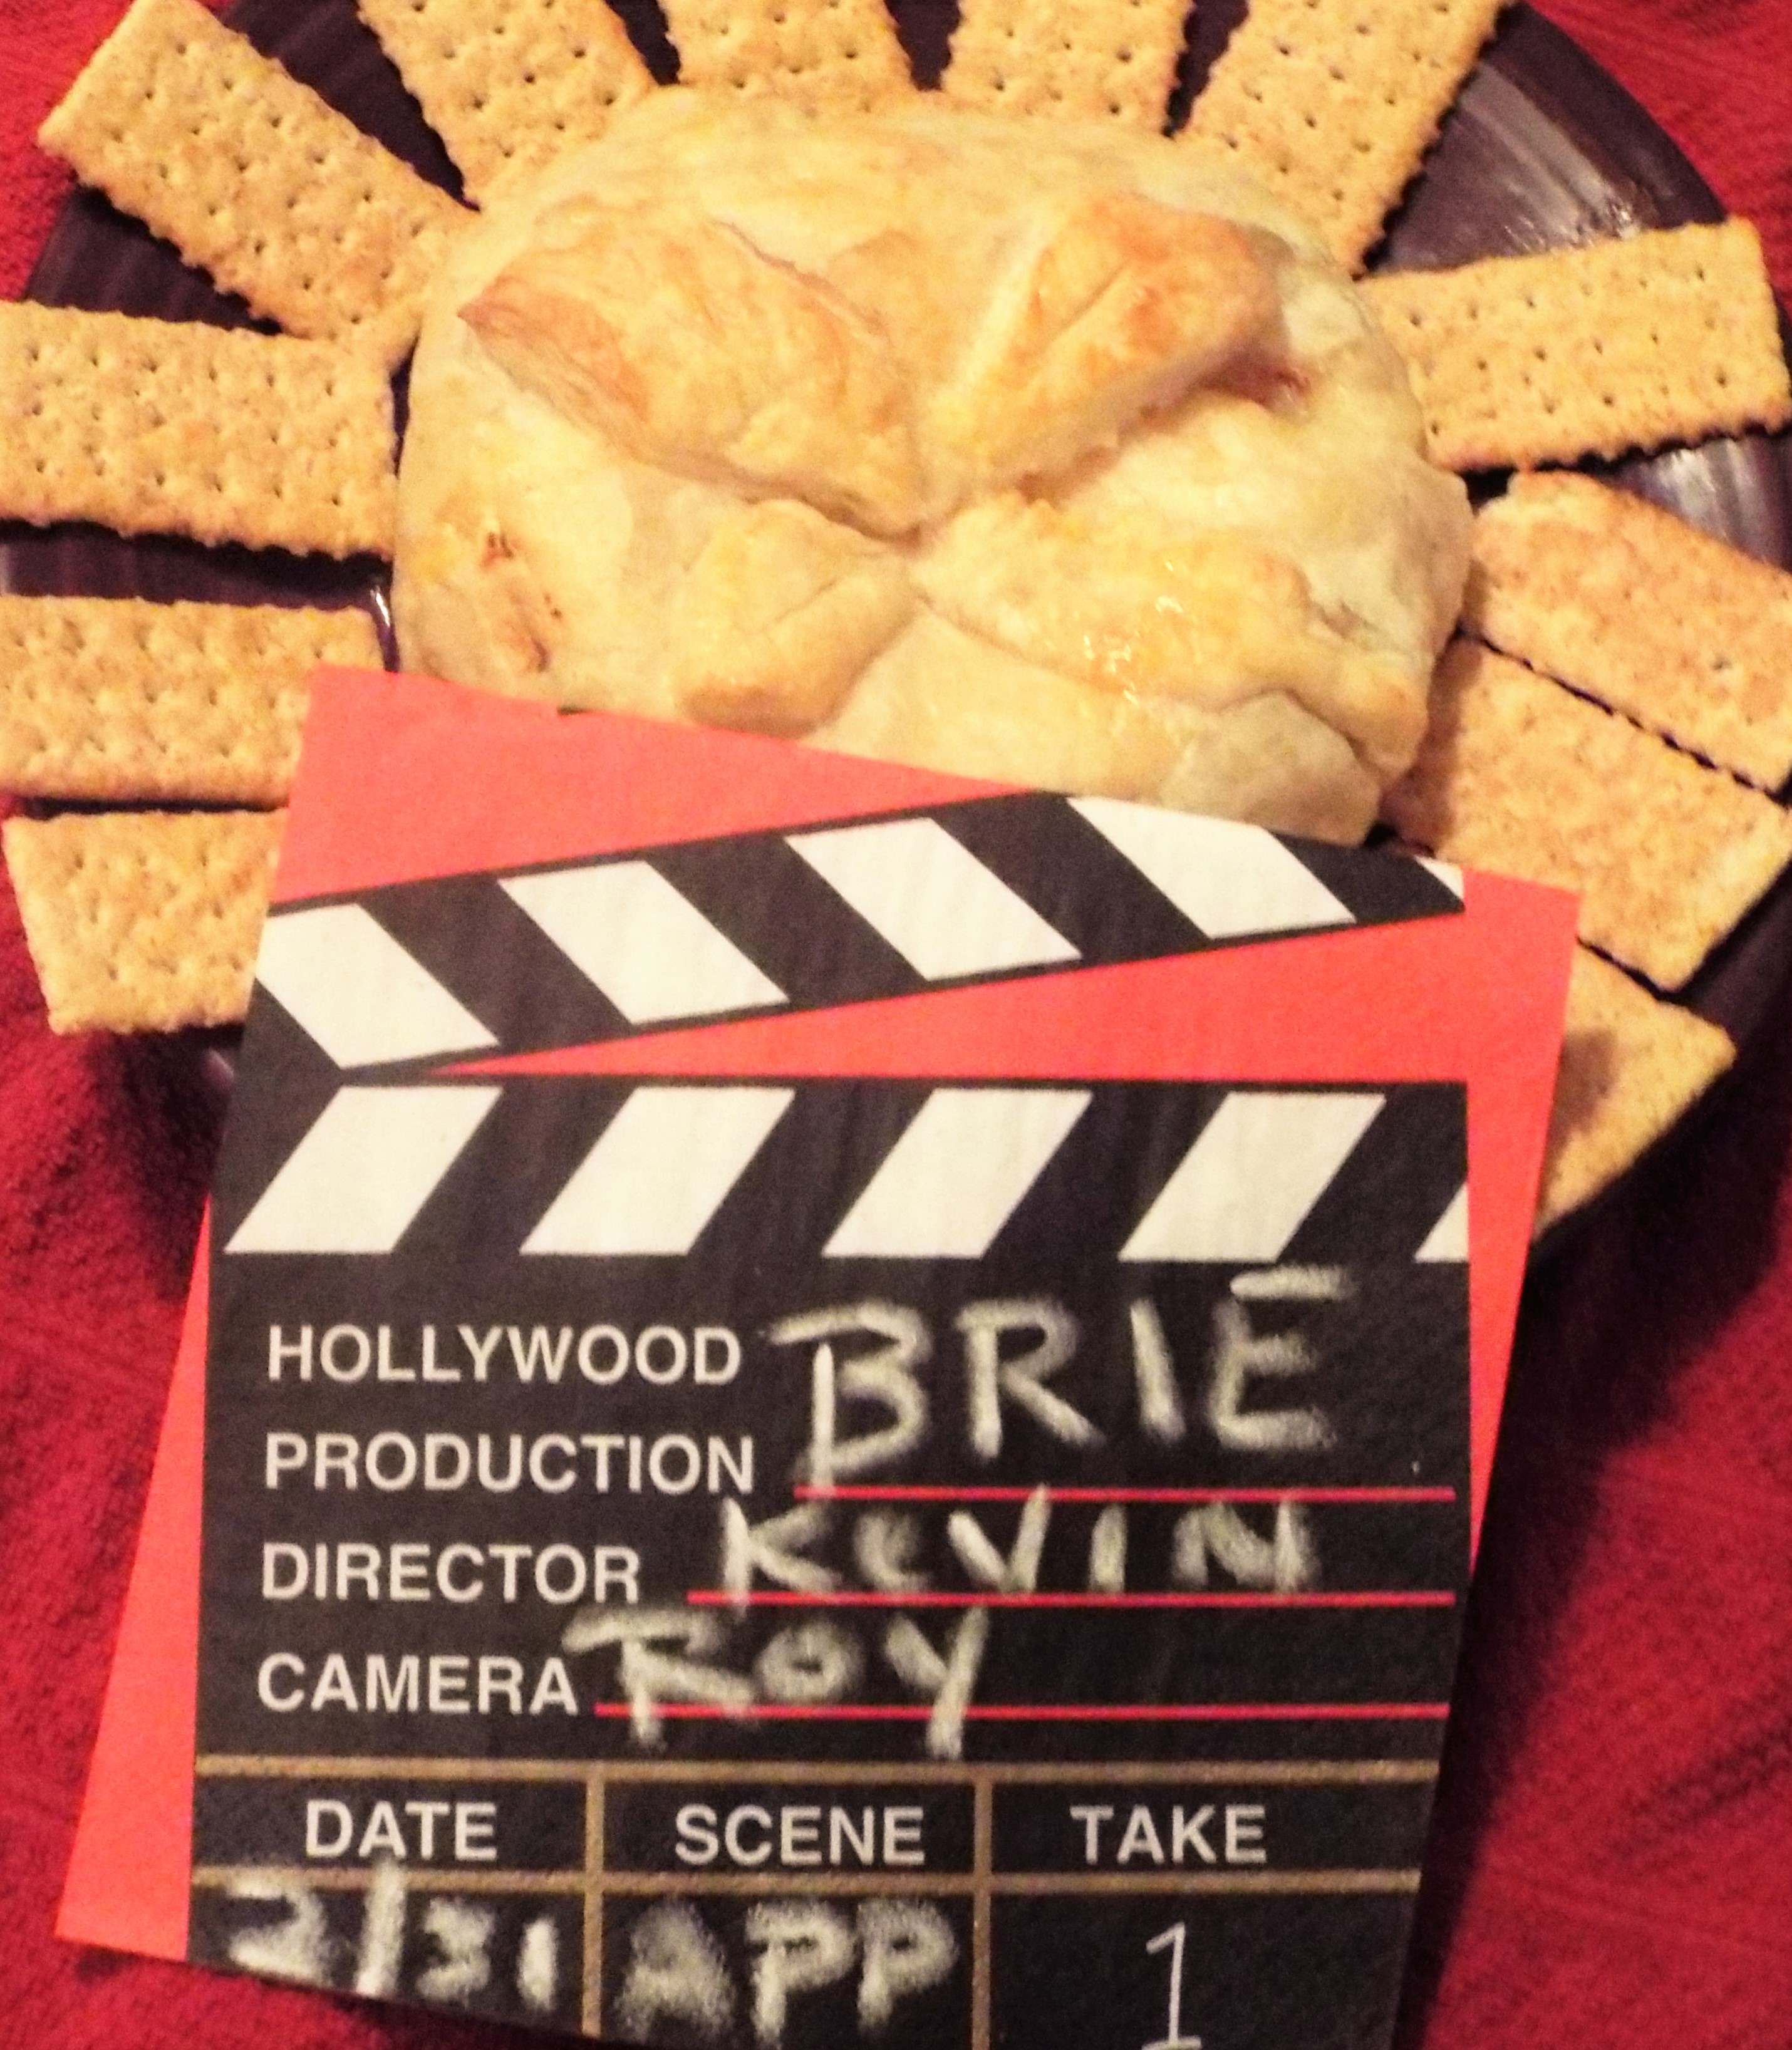
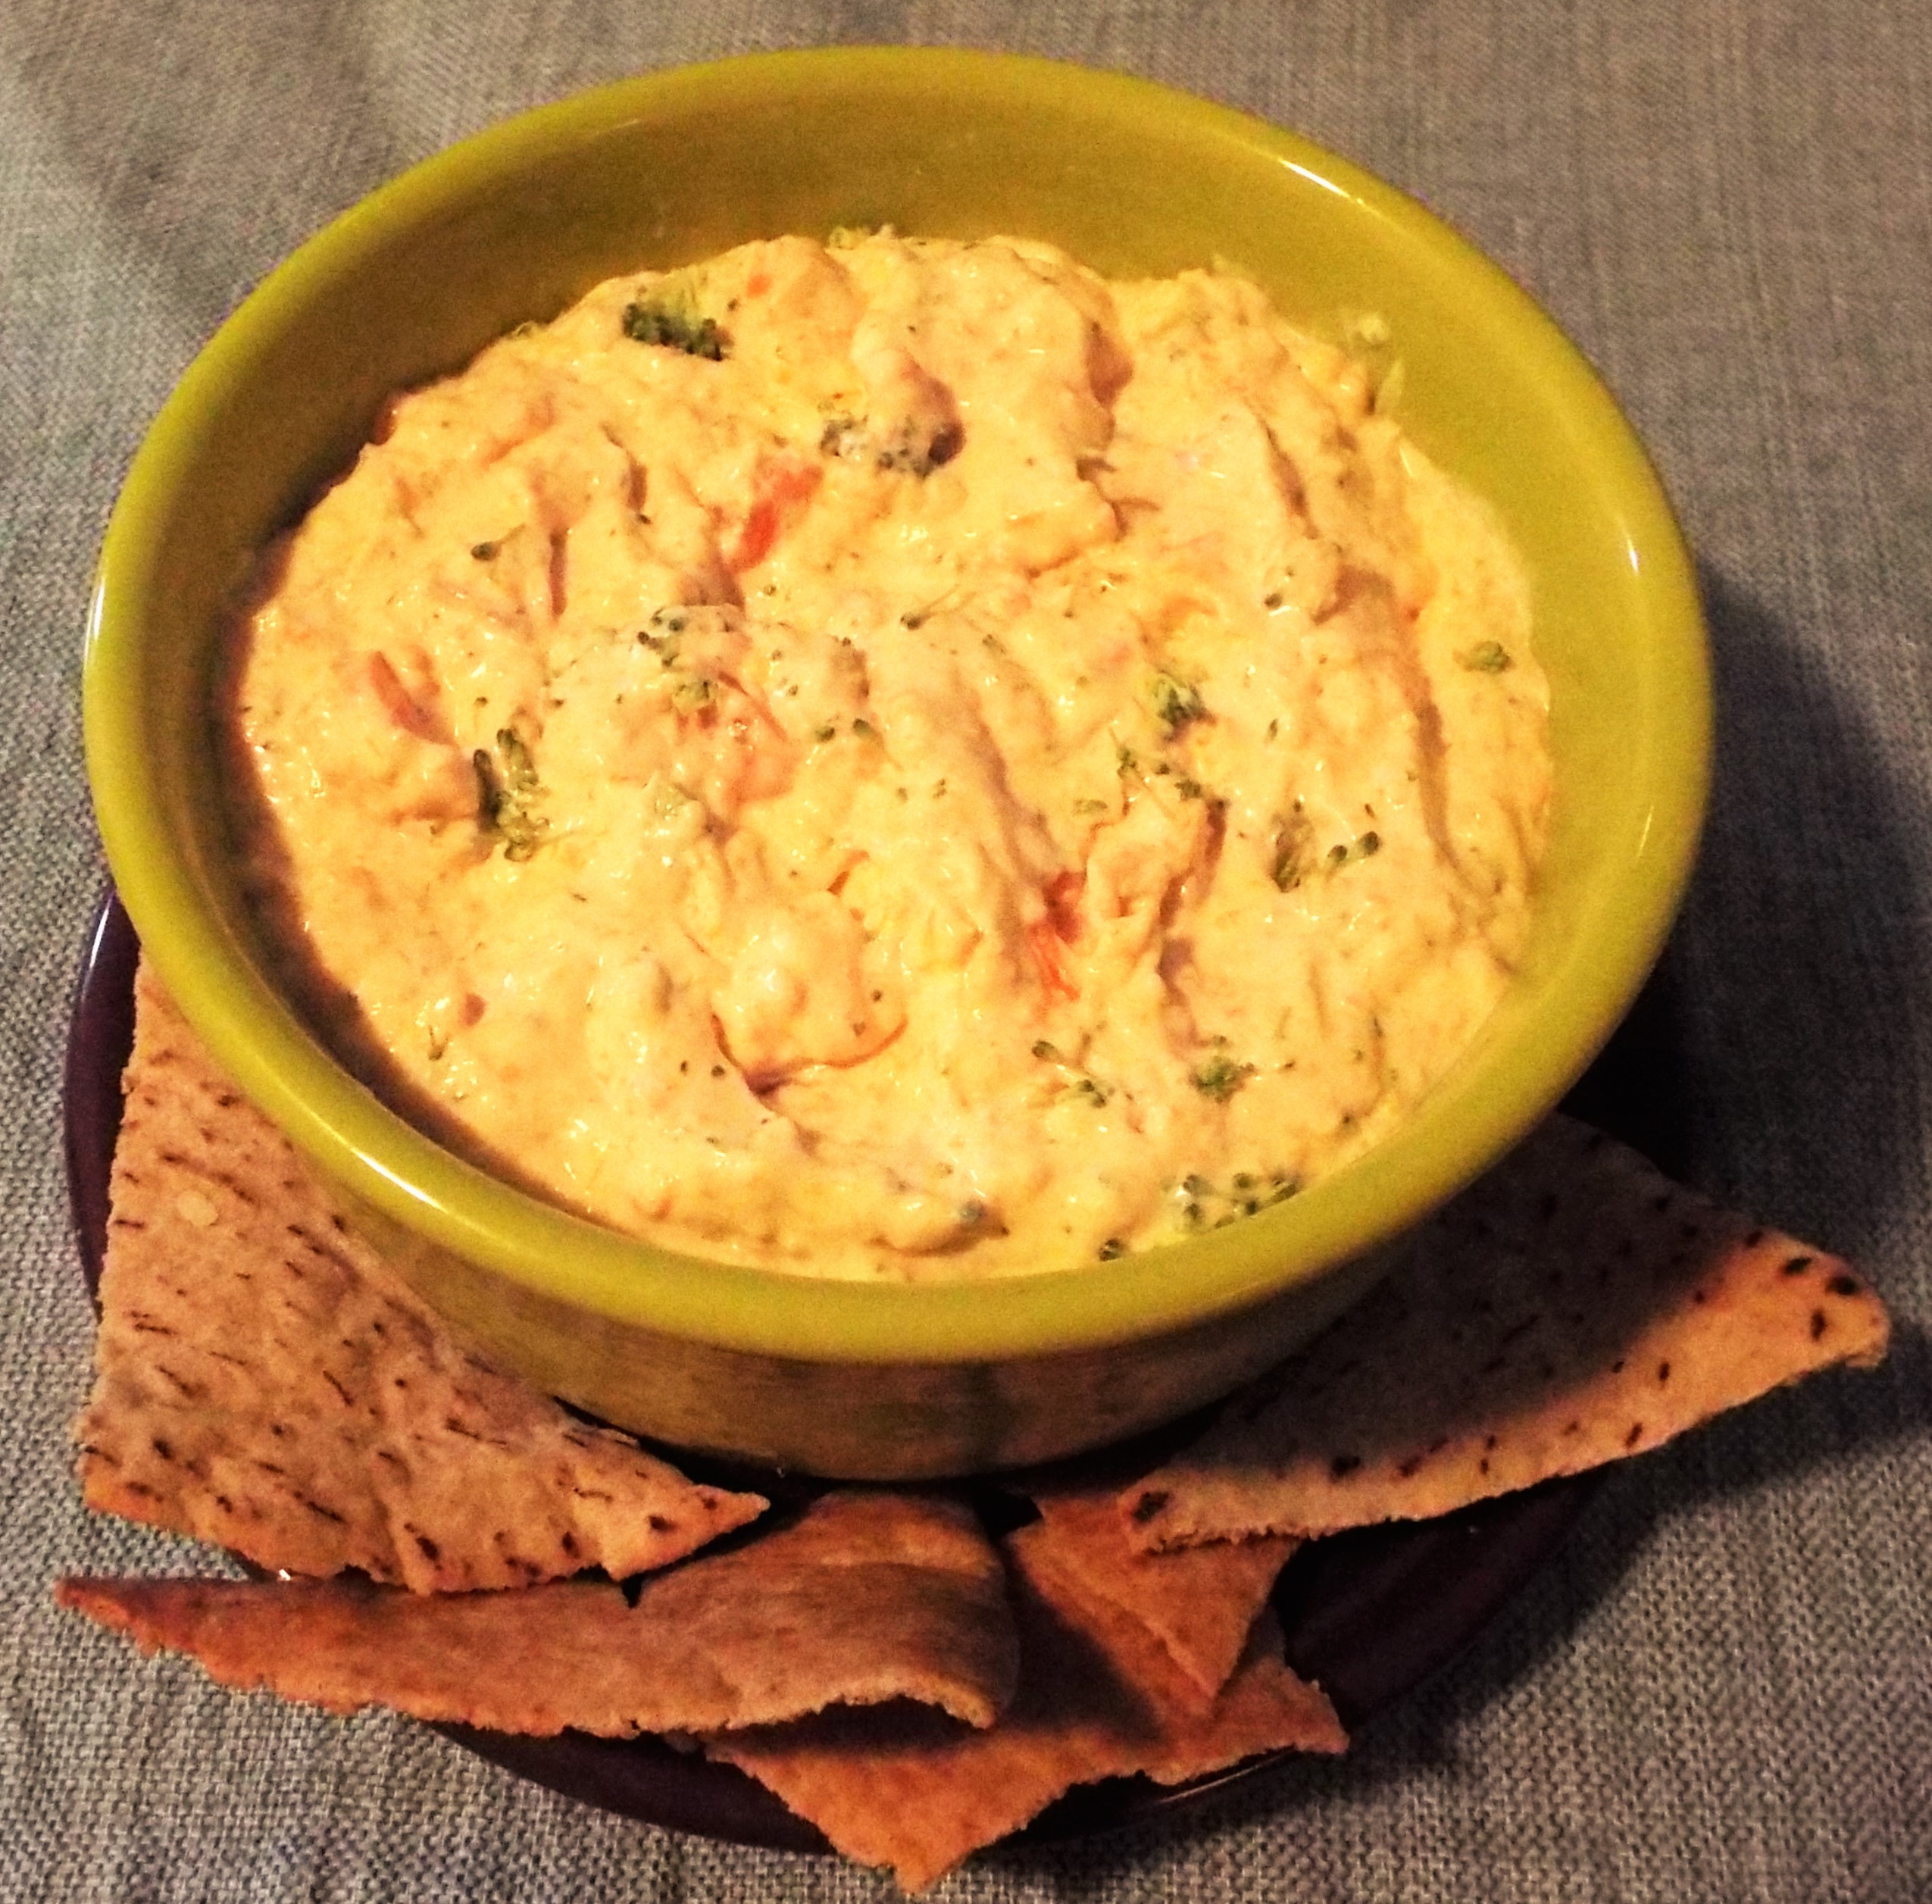
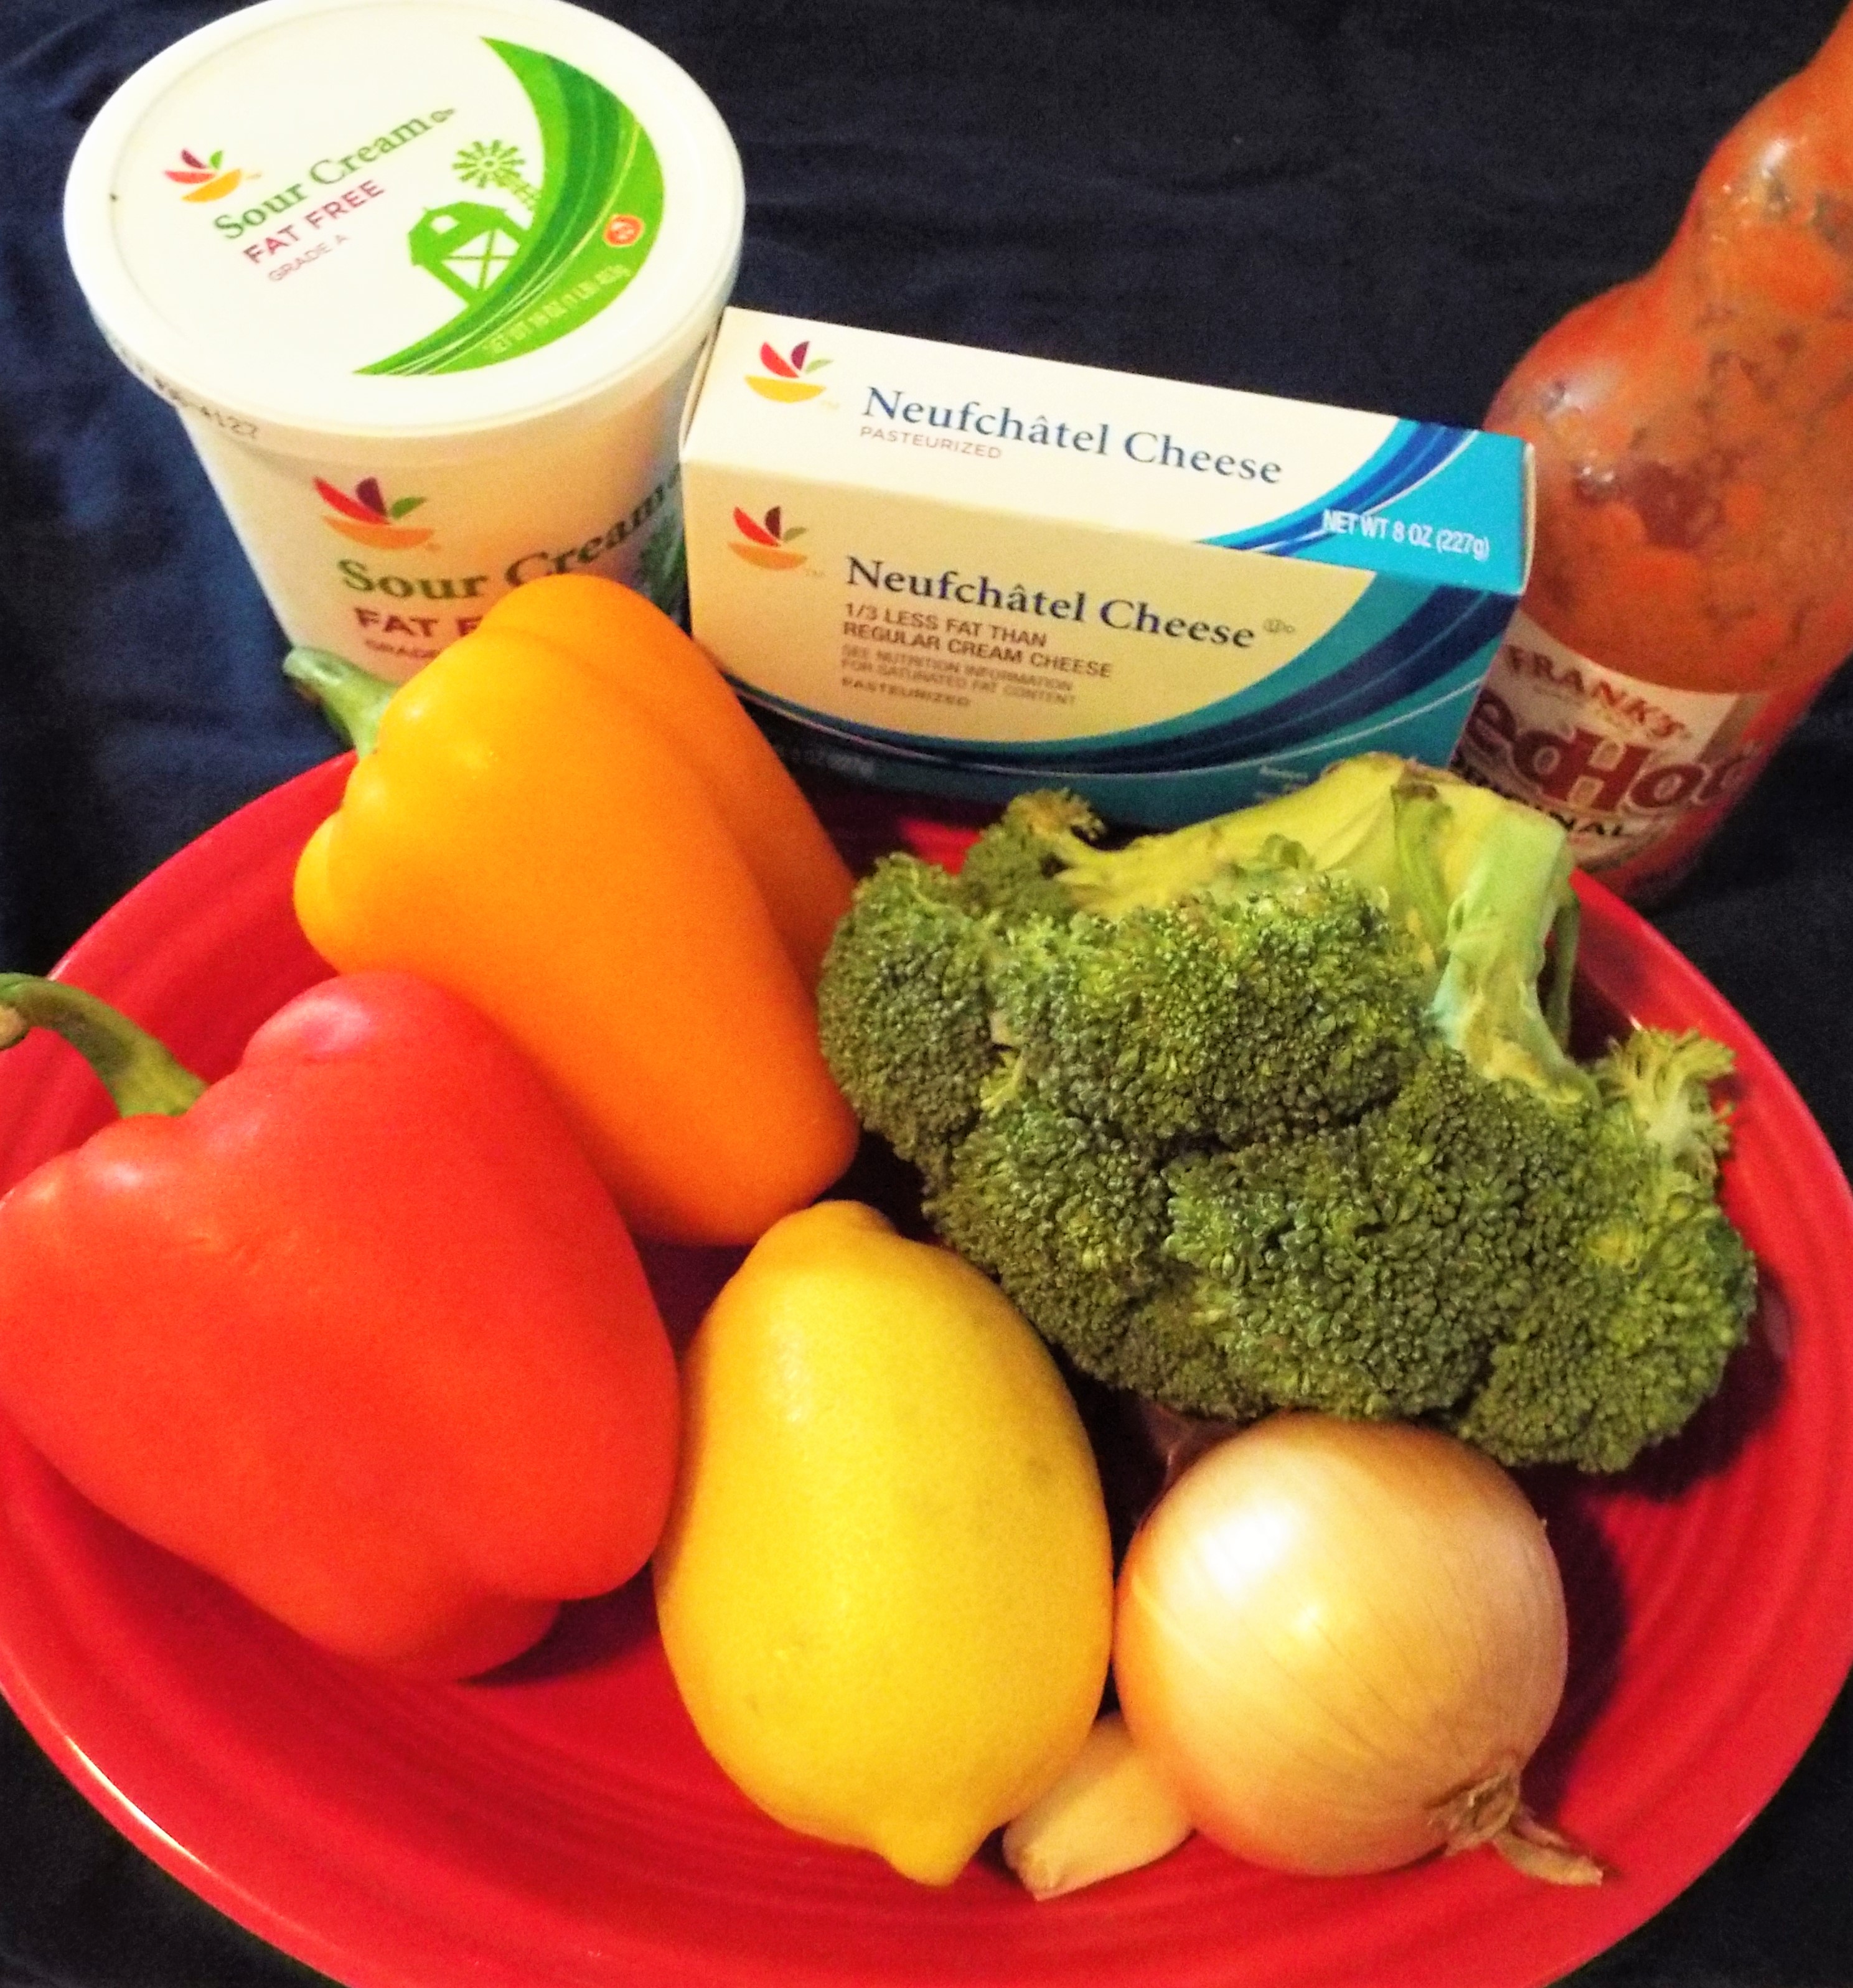
HONEY AND WALNUT BAKED BRIE

DSCF2637 (2)

DSCF2592 (2)

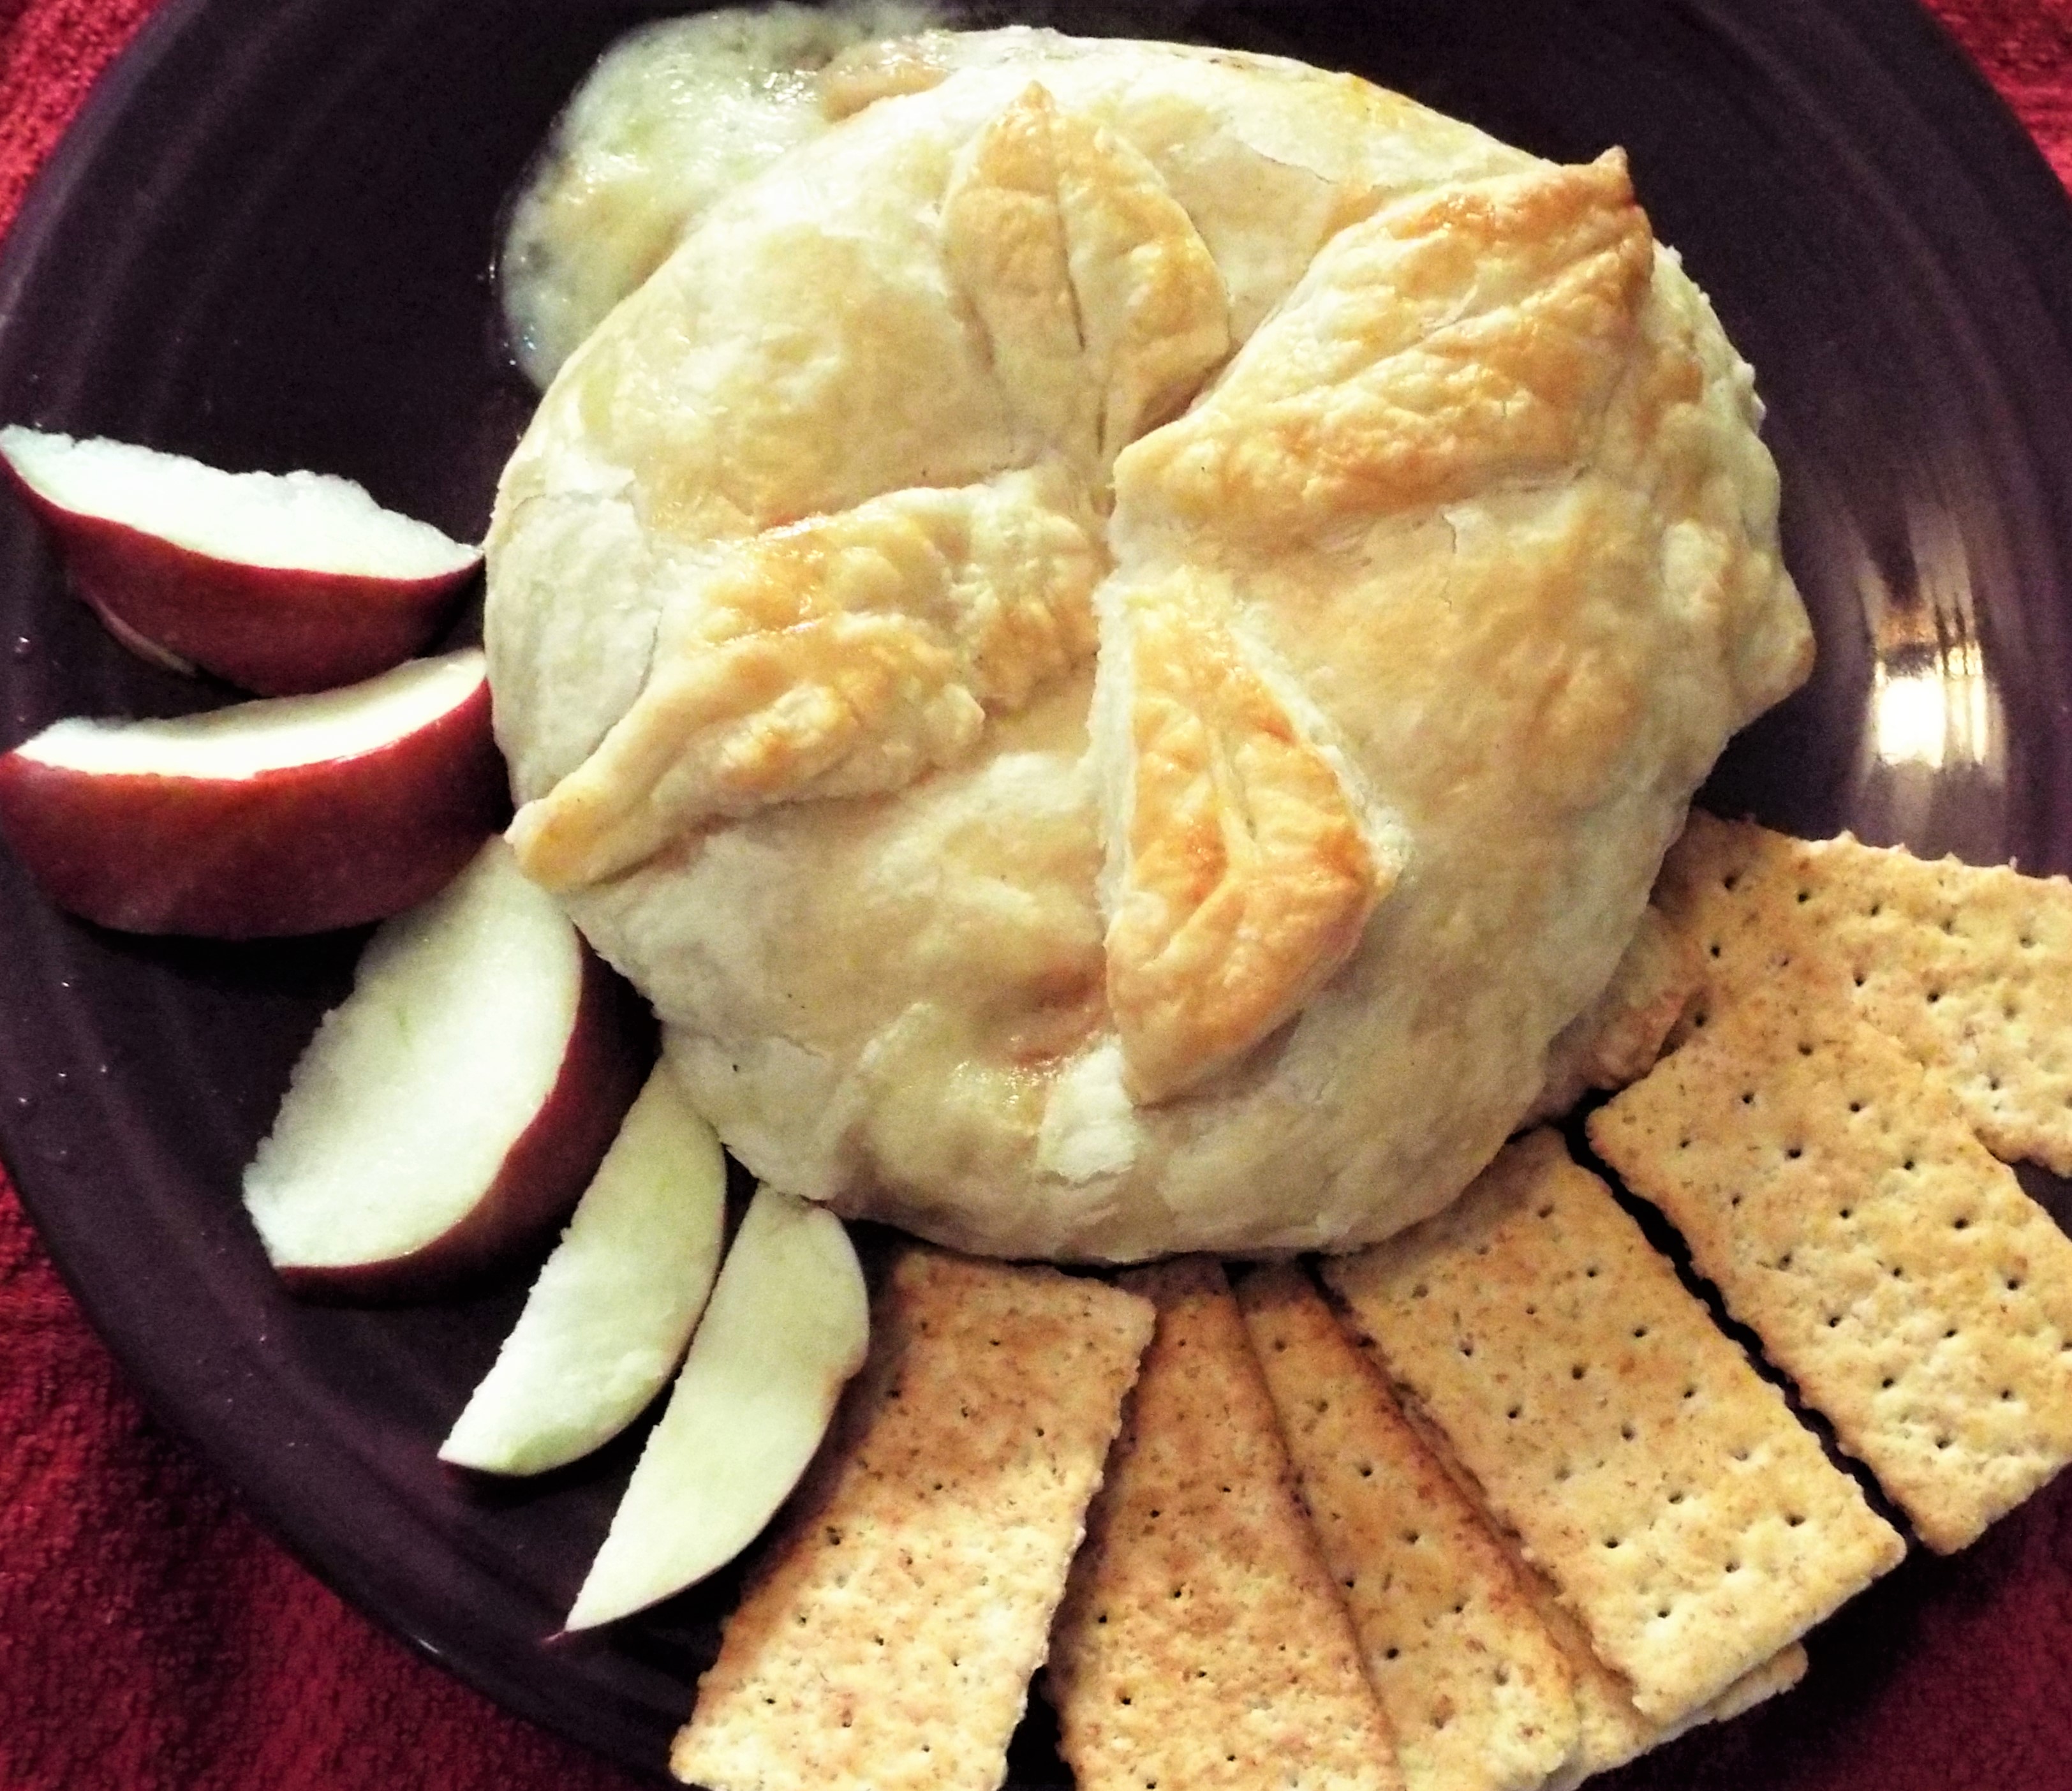
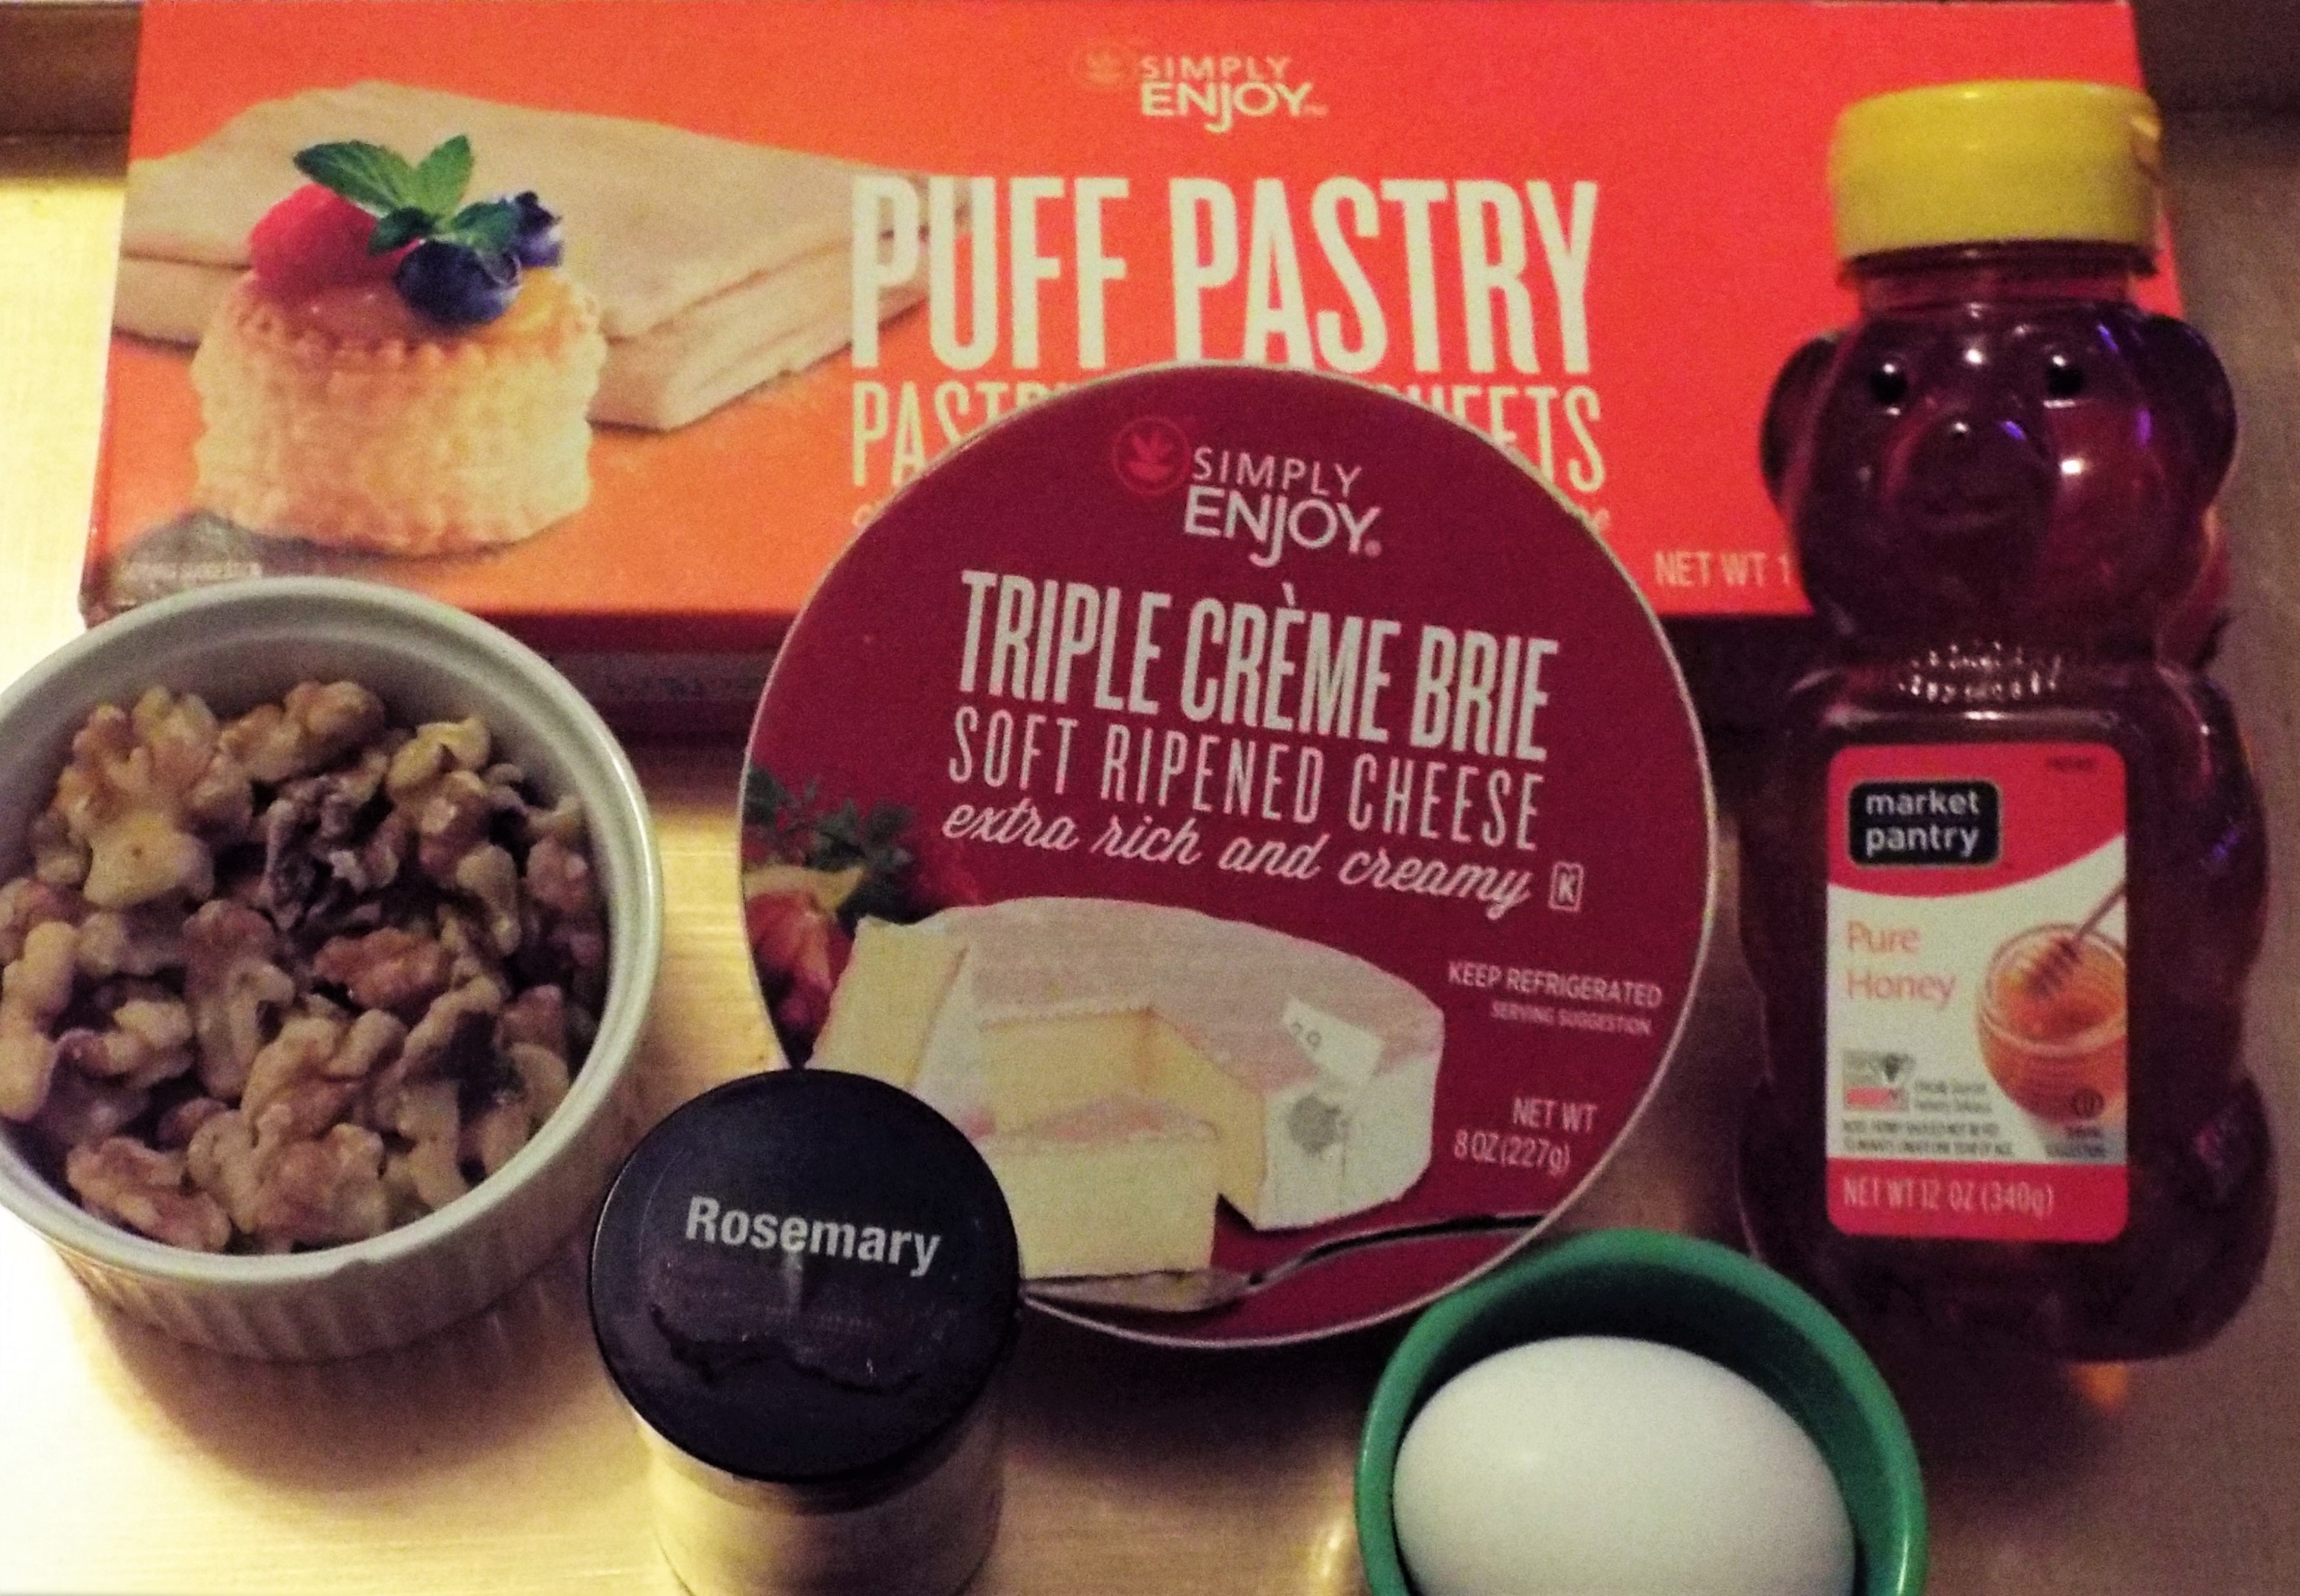
We found this great recipe for brie in puff pastry on-line. It’s unique because the brie is sliced sandwich-style and the walnut/honey mixture fills what becomes the ultimate cheese sandwich. Hmm . . . we hear Brie is a favorite for this year’s Academy Awards. Oh wait! That’s Brie Larson, favored to win Best Actress for her performance in “The Room”. Good luck to all of this year’s nominees.

http://www.puffpastry.com/recipe/50003/honey-and-walnut-baked-brie

WINNING SALAD

DSCF2612 (2)


DSCF2617 (2)

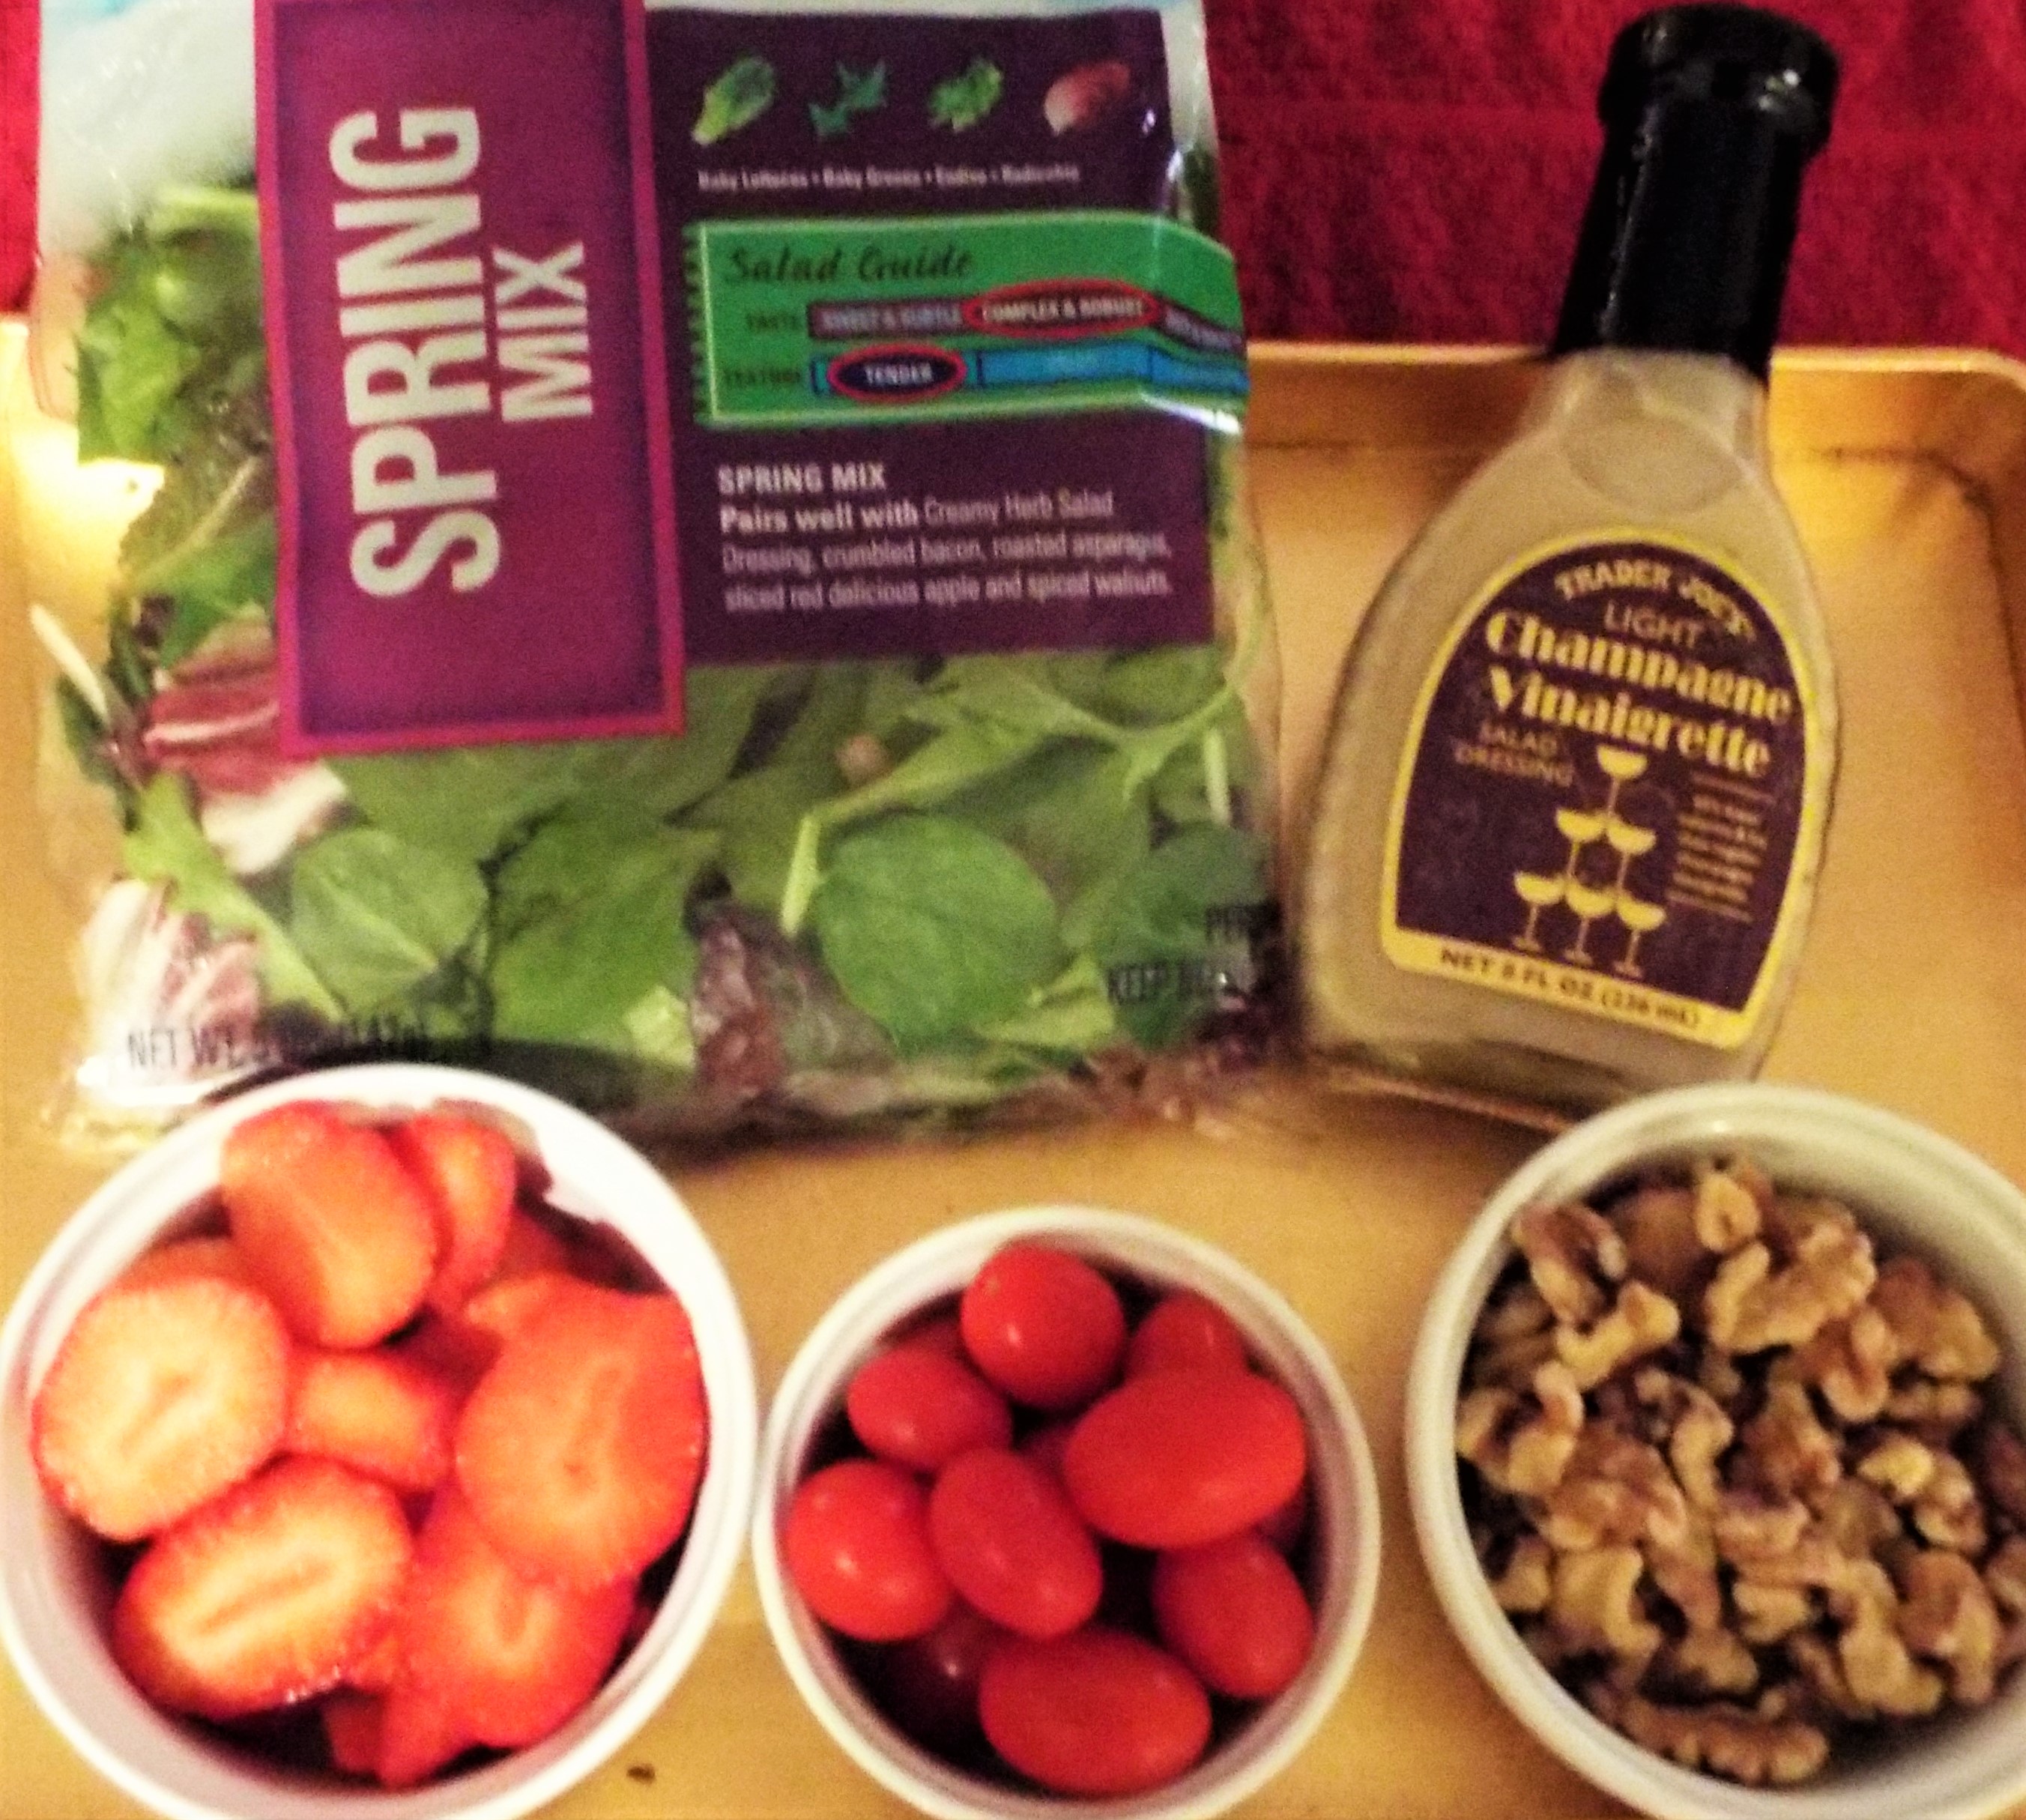
Champagne vinaigrette coats this delicious salad which combines strawberries, walnuts, cherry tomatoes, goat cheese, and Dole Spring Mix Salad. Check out our crispy chicken or shrimp recipes in the links below to make this salad a great entrée!

https://funclesarts.com/2015/08/17/mystery-solved-fun/

https://funclesarts.com/2016/02/06/super-weekend/

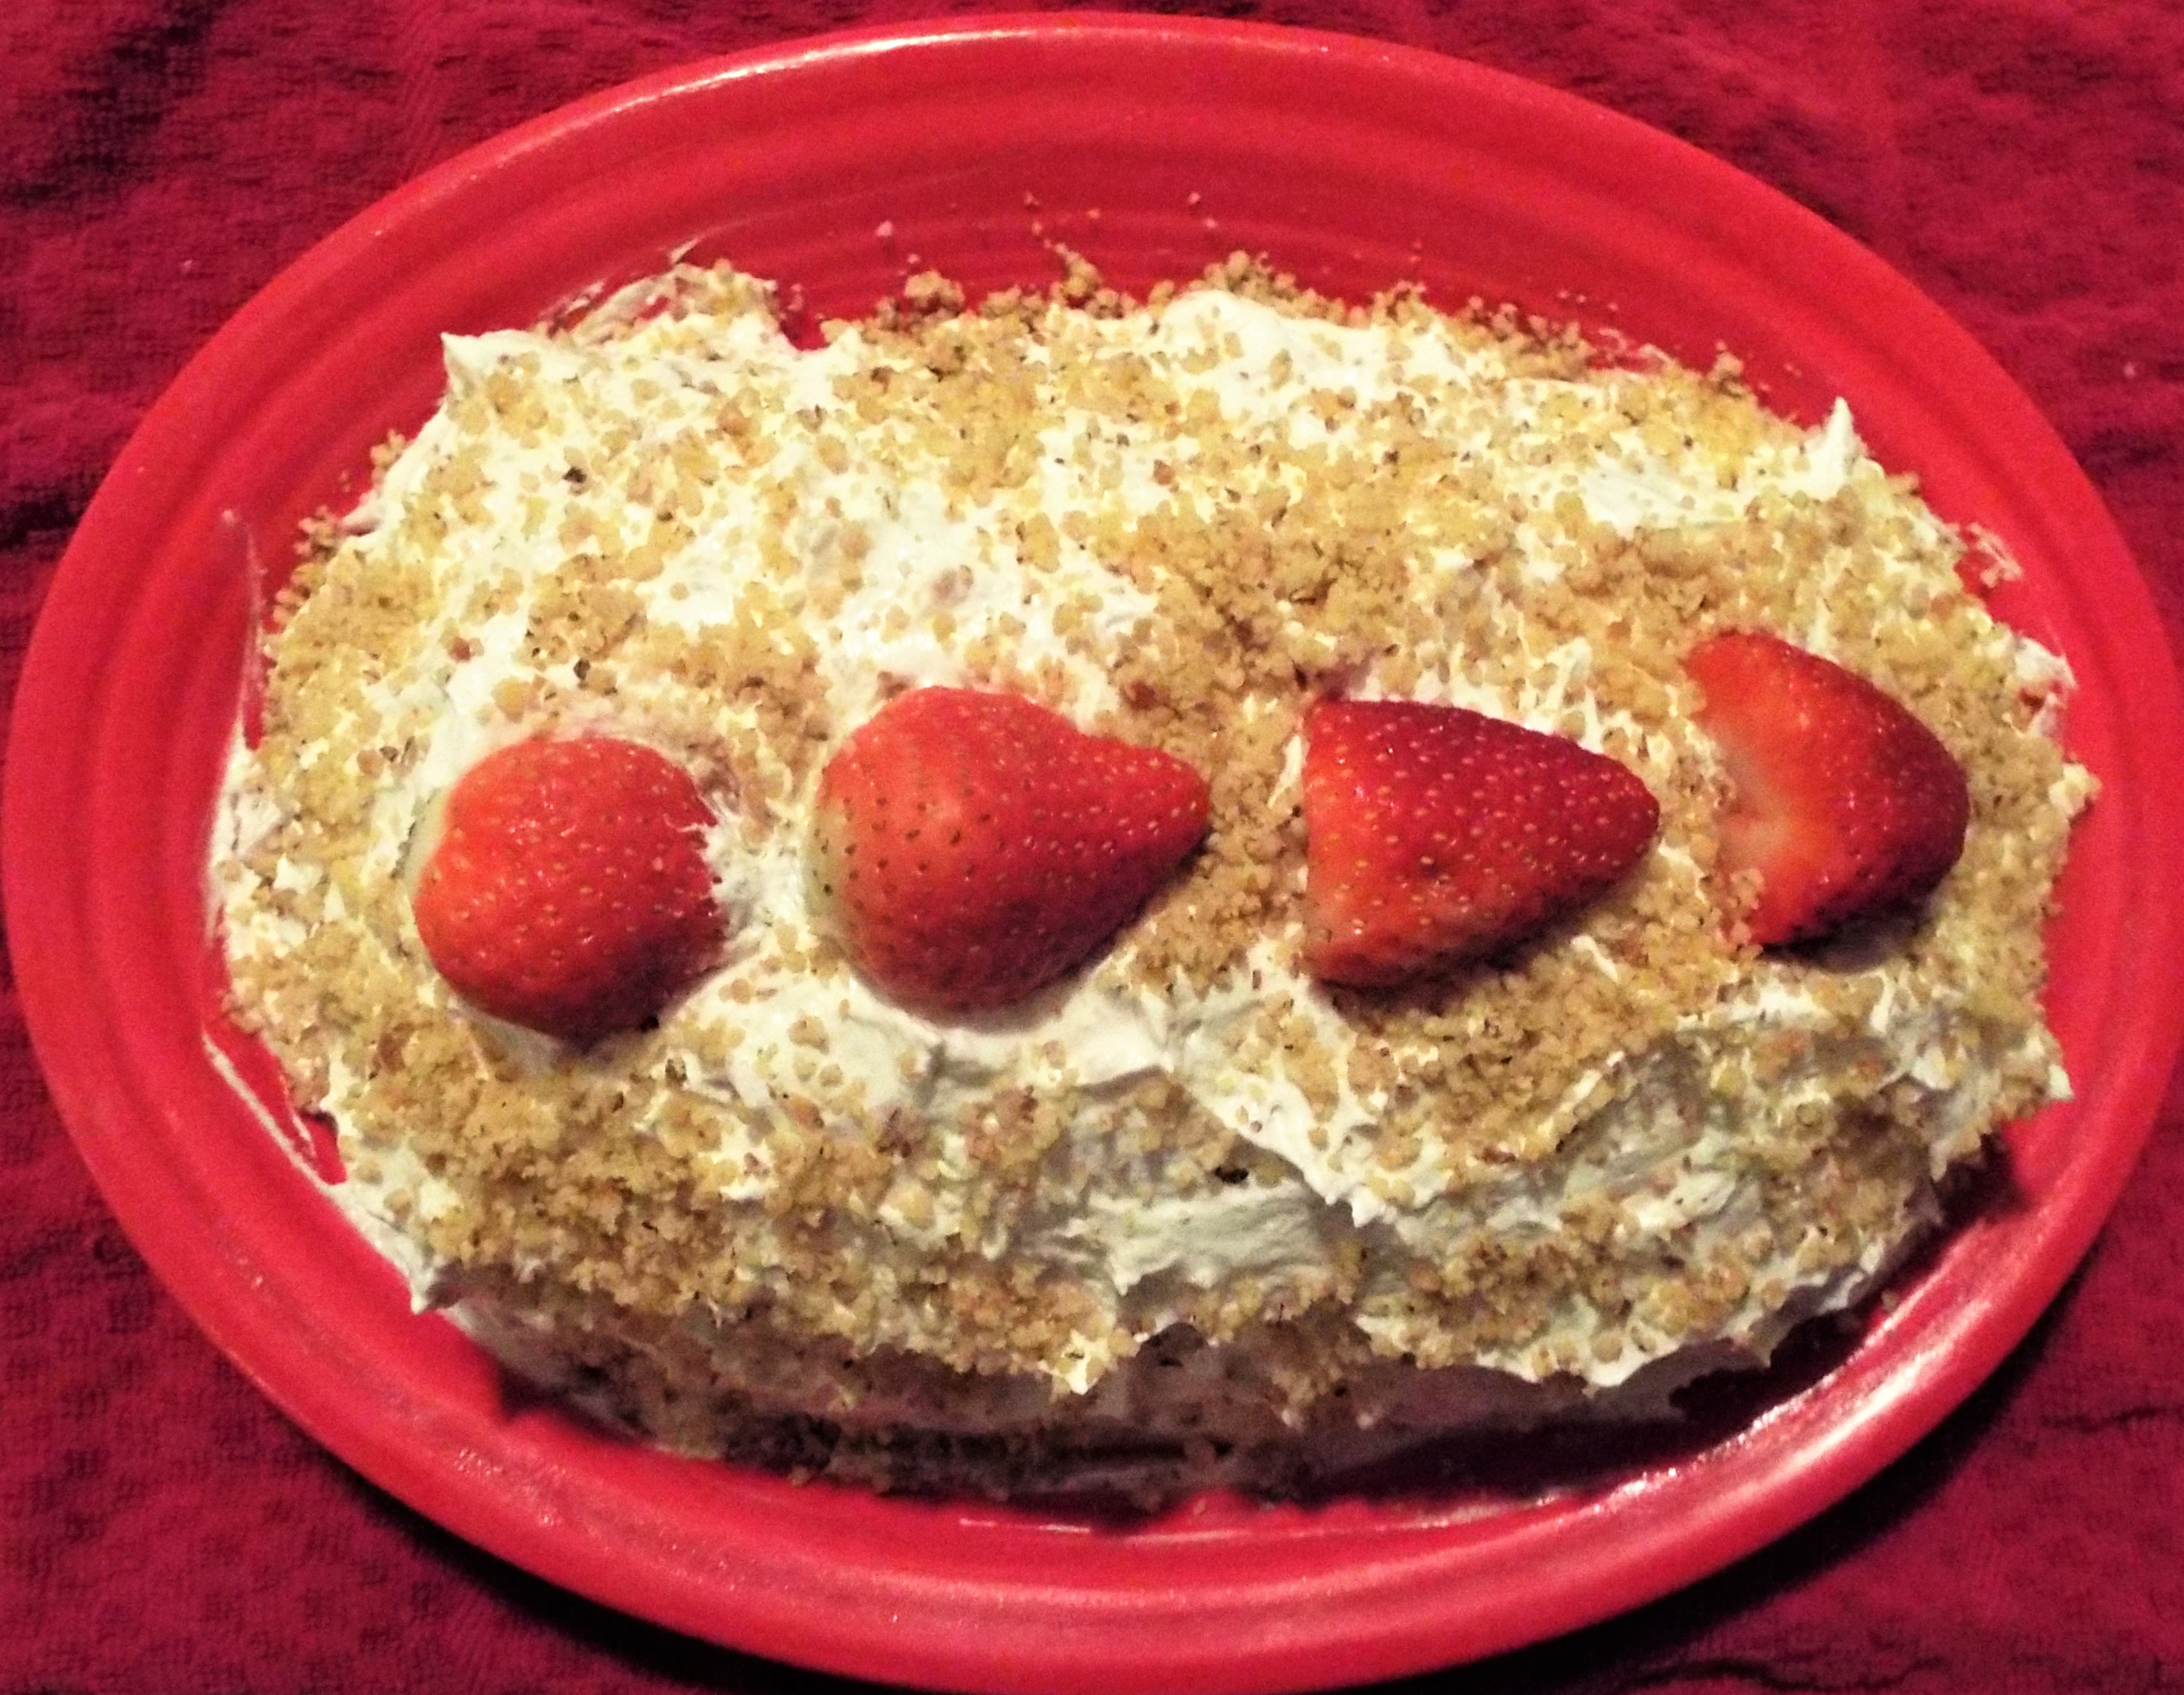
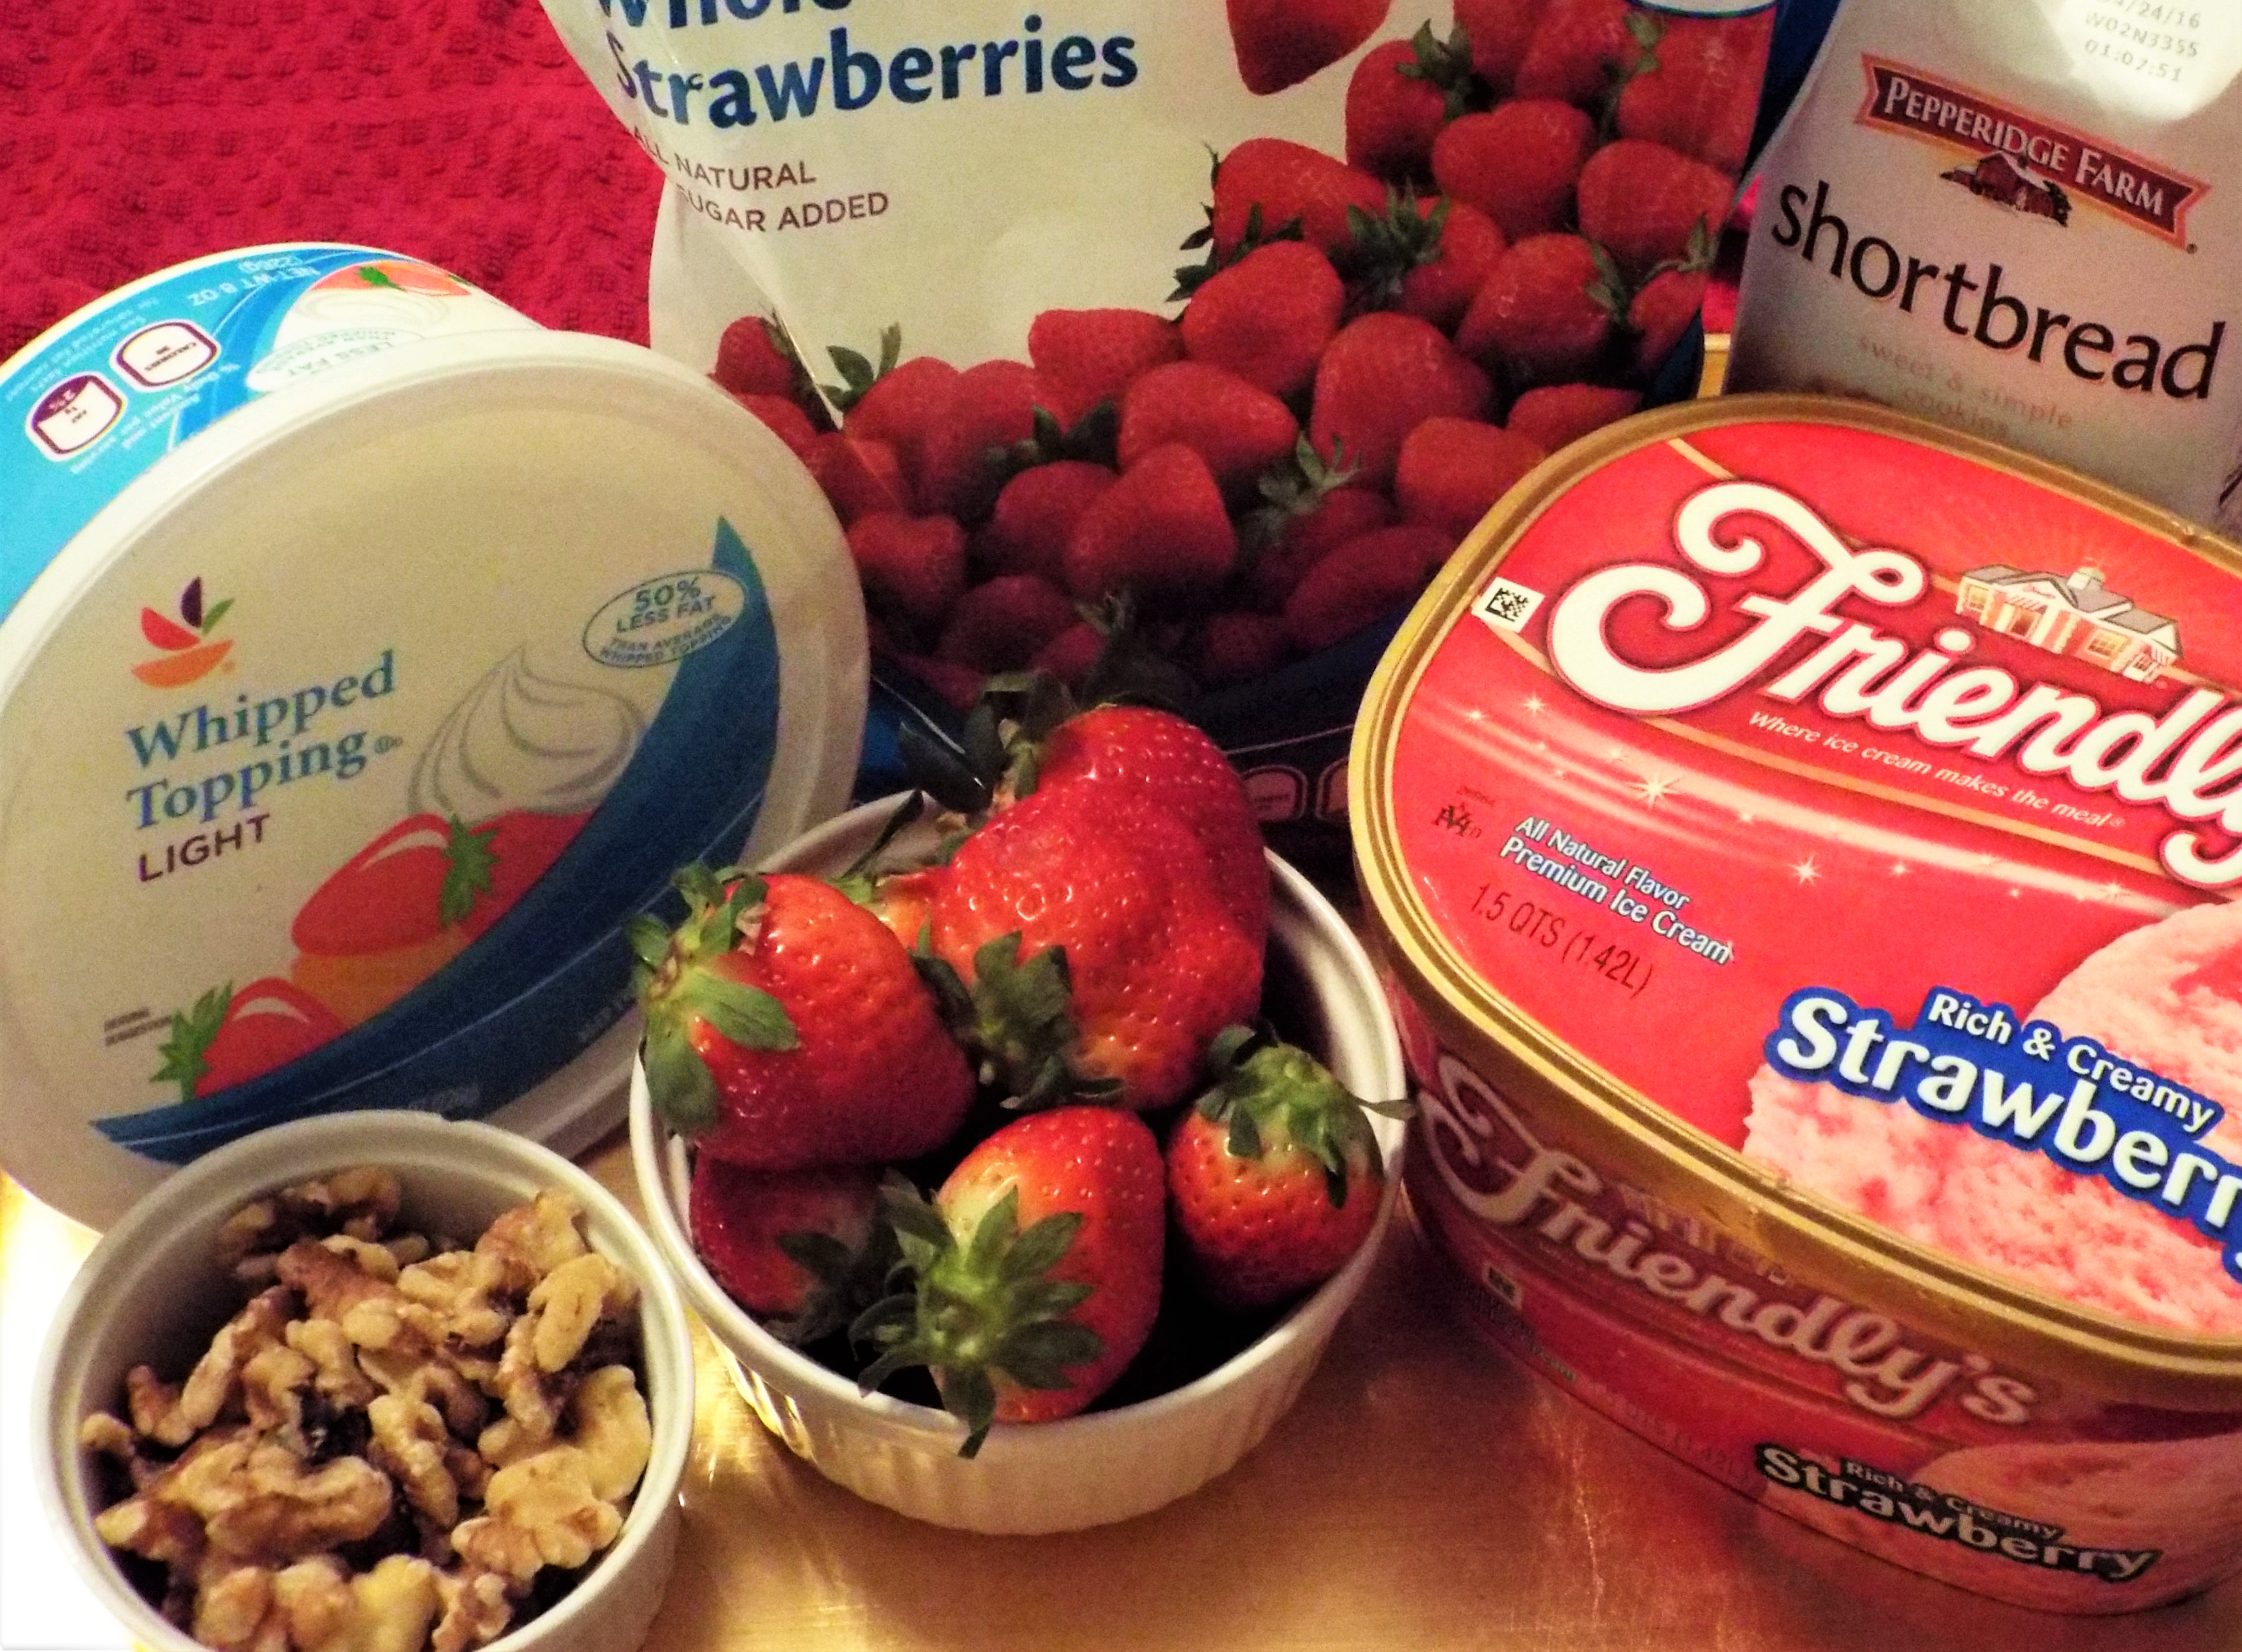
STRAWBERRY SHORTCAKE ICE CREAM CAKE

DSCF2655 (2)

What you need:

  • 1.5-qt strawberry ice cream
  • shortbread cookies (we used Pepperidge Farm 5.5 oz.)
  • toasted walnuts, ground
  • 1/2 tub of whipped topping
  • 5 ounces strawberry jelly (we prefer Polaner All Fruit)
  • sliced strawberries (fresh or frozen)

How to prepare:

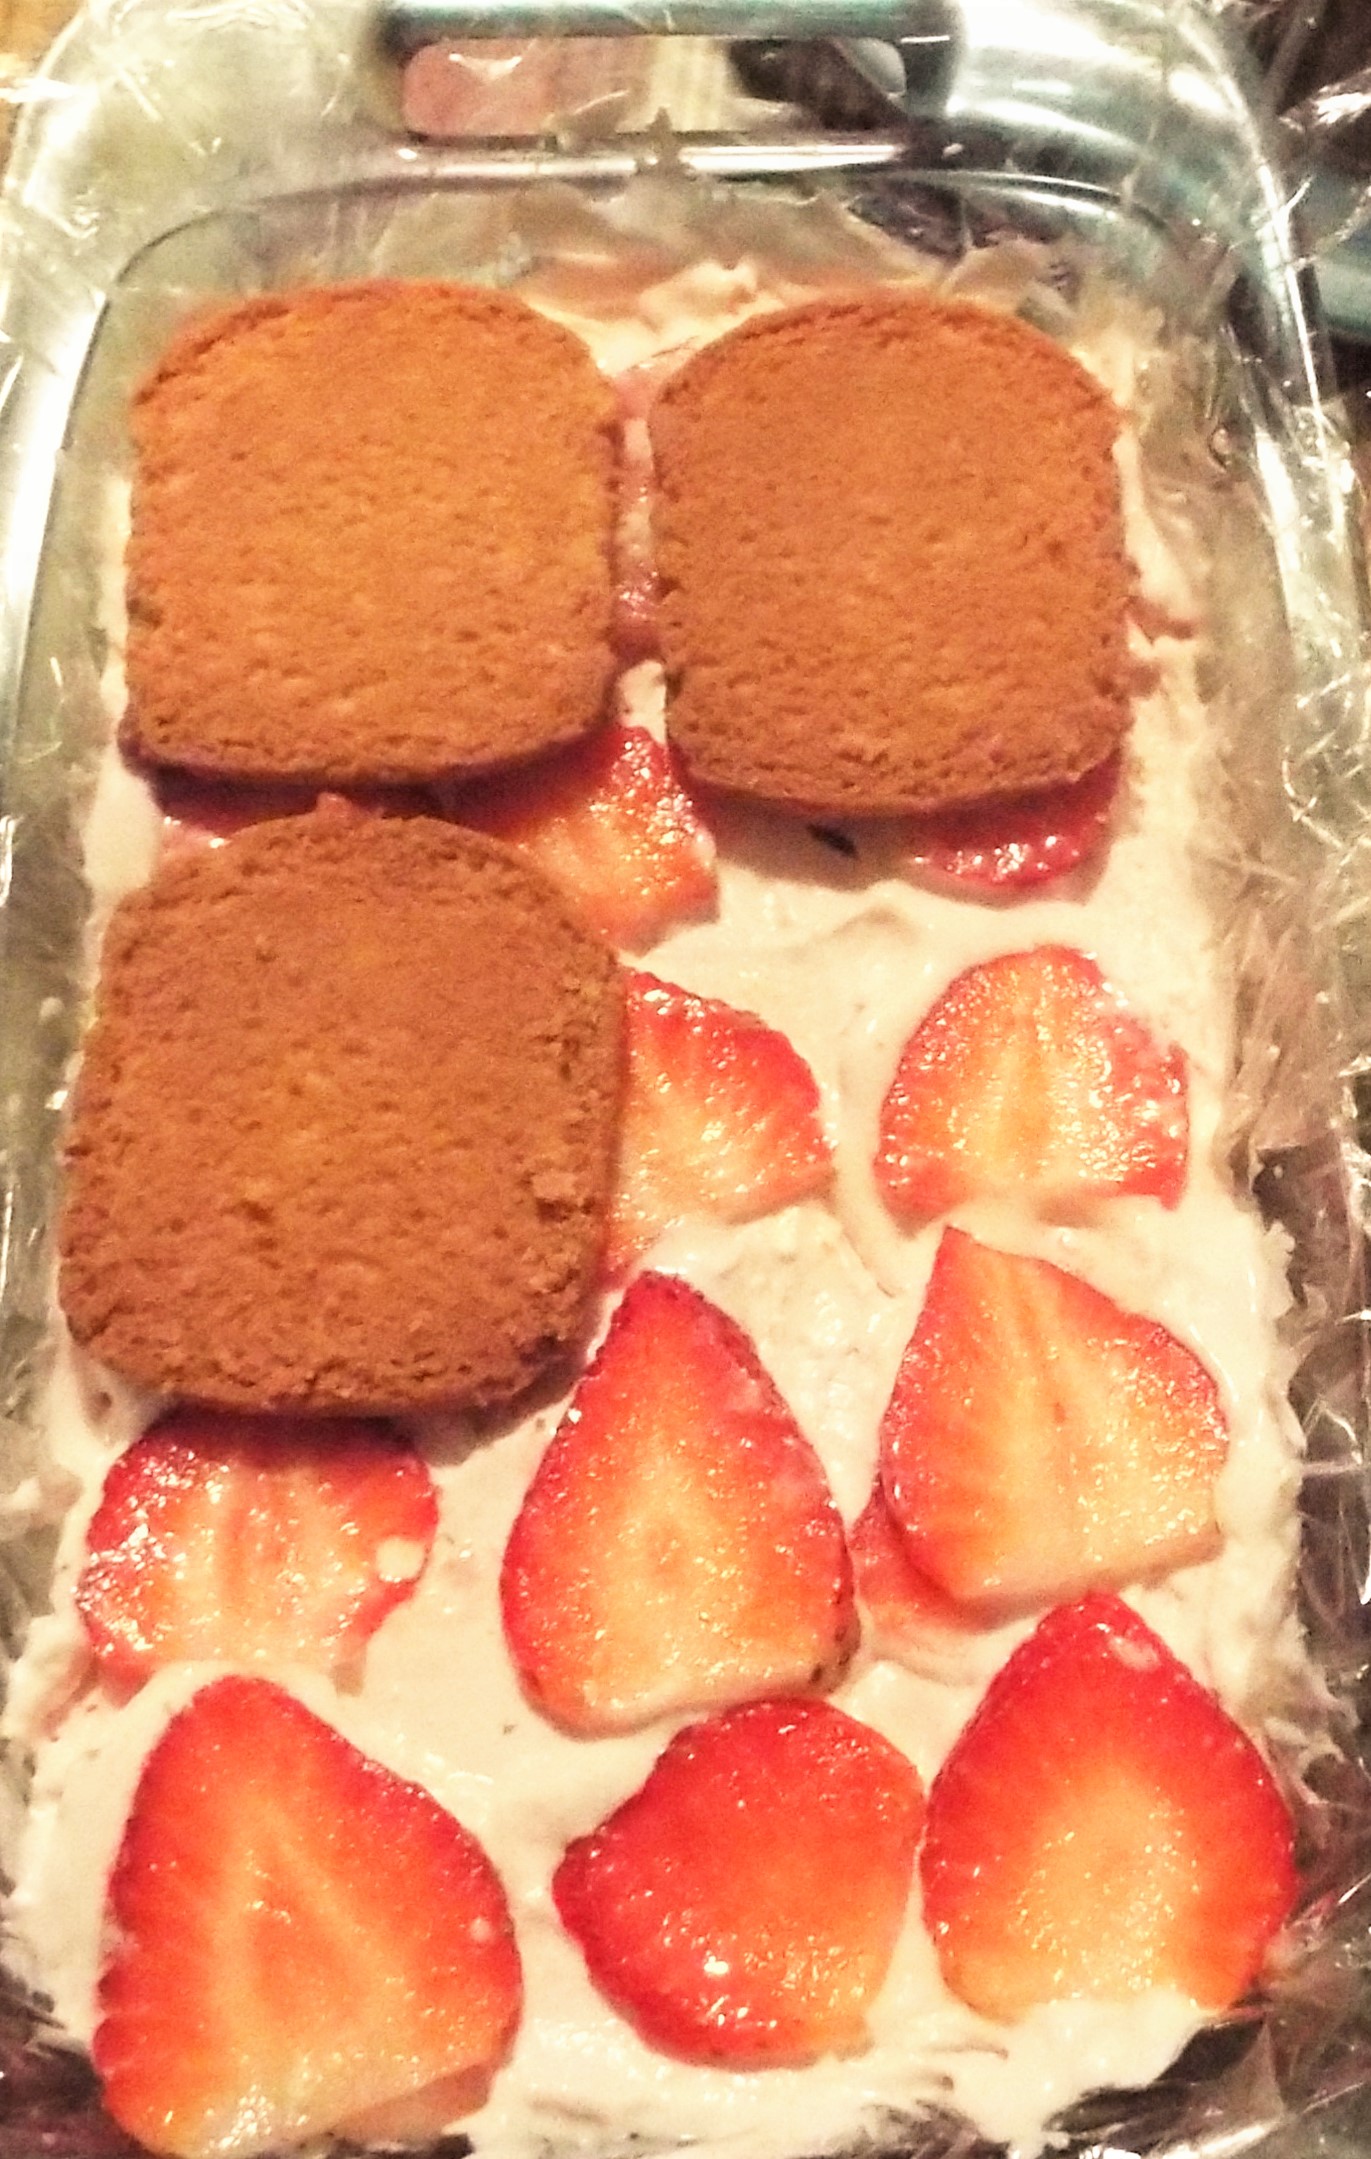
  • Spray loaf pan with cooking spray.
  • Line pan with parchment paper or wax paper, overhanging the pan on all sides.
  • Put a layer of ice cream in bottom of pan.
  • Add a layer of sliced strawberries on top of ice cream.
  • Add a layer of cookies; 6 cookies work well for first layer.
  • Repeat with second layer of ice cream, sliced strawberries and cookies. Use cookie pieces to fill in if necessary.
  • Wrap up and freeze overnight.

Invert ice cream cake onto platter. If cake will not release, place pan in warm water for a few minutes.

  • Mix whipped topping with strawberry jelly.
  • Frost cake with topping mixture.
  • Sprinkle with crushed nuts.
  • Decorate cake with strawberries.
  • Re-freeze.
  • Enjoy!

This ice cream cake idea has limitless possibilities! Combine your favorite wafer cookie, ice cream and fruit for an easy, delicious dessert. Our next mashup might be chocolate wafer cookies, coffee ice cream and bananas! What other combinations would work?

DSCF2589 (2)

DSCF2603 (2)DSCF2605 (2)

 NAPKIN BANNER

We made a banner out of these fun movie-themed napkins found at Party City. Simply string a ribbon or wire between two points and place the napkins over them. These napkins could serve multiple purposes. They can be used as place cards for a sit down dinner or to identify food options at a buffet. Just use white chalk to fill in details on the napkins.

DSCF2624 (2)

DSCF2639 (2)

DON’T FORGET TO VOTE!

There have been a lot of unbelievable, shocking, comical and jaw-dropping “performances” this year. But enough about the presidential elections! The Oscars honor the best in moviemaking.

Here is a printable ballot for this year’s Academy Awards. Print out enough ballots for your party and have everyone vote for their favorites. Offer a prize for the person with the most correct choices. Maybe a bottle of champagne?

http://www.ibtimes.com/oscars-2016-printable-ballot-watching-88th-academy-awards-home-2323593

More fun stuff!

For more ideas, check out last year’s blog at:
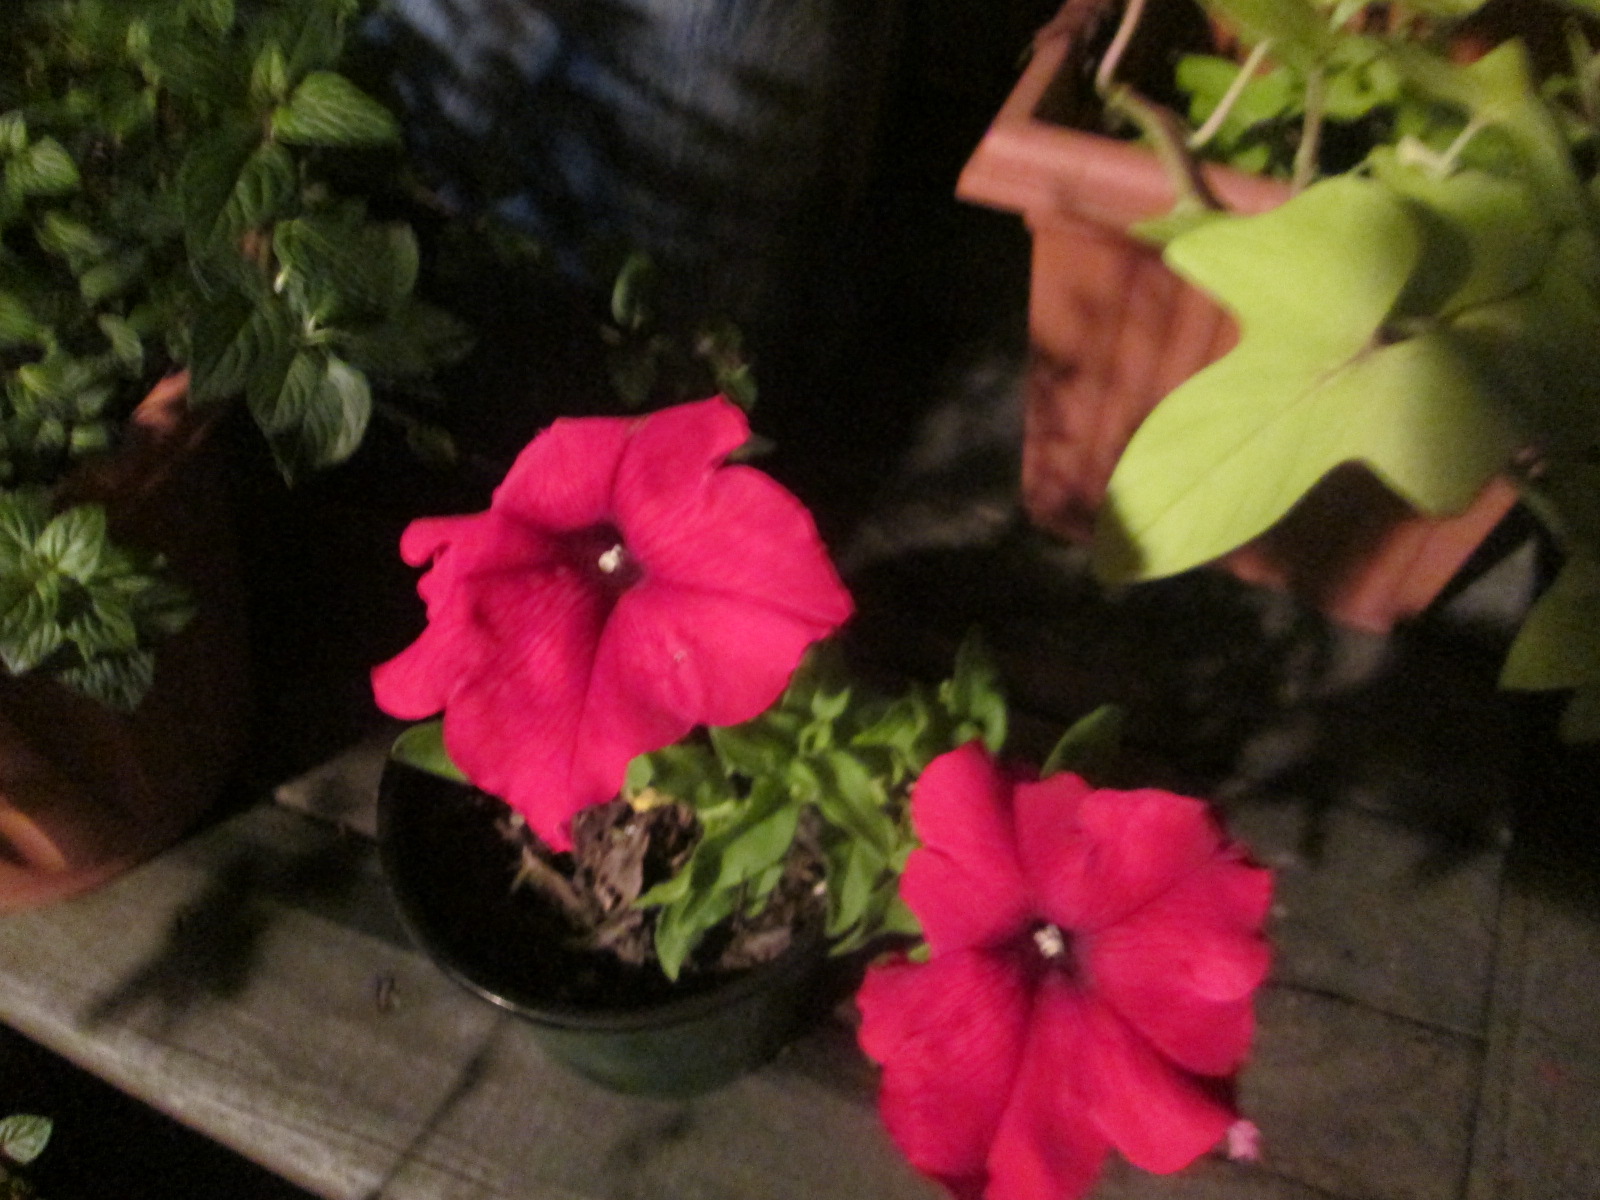
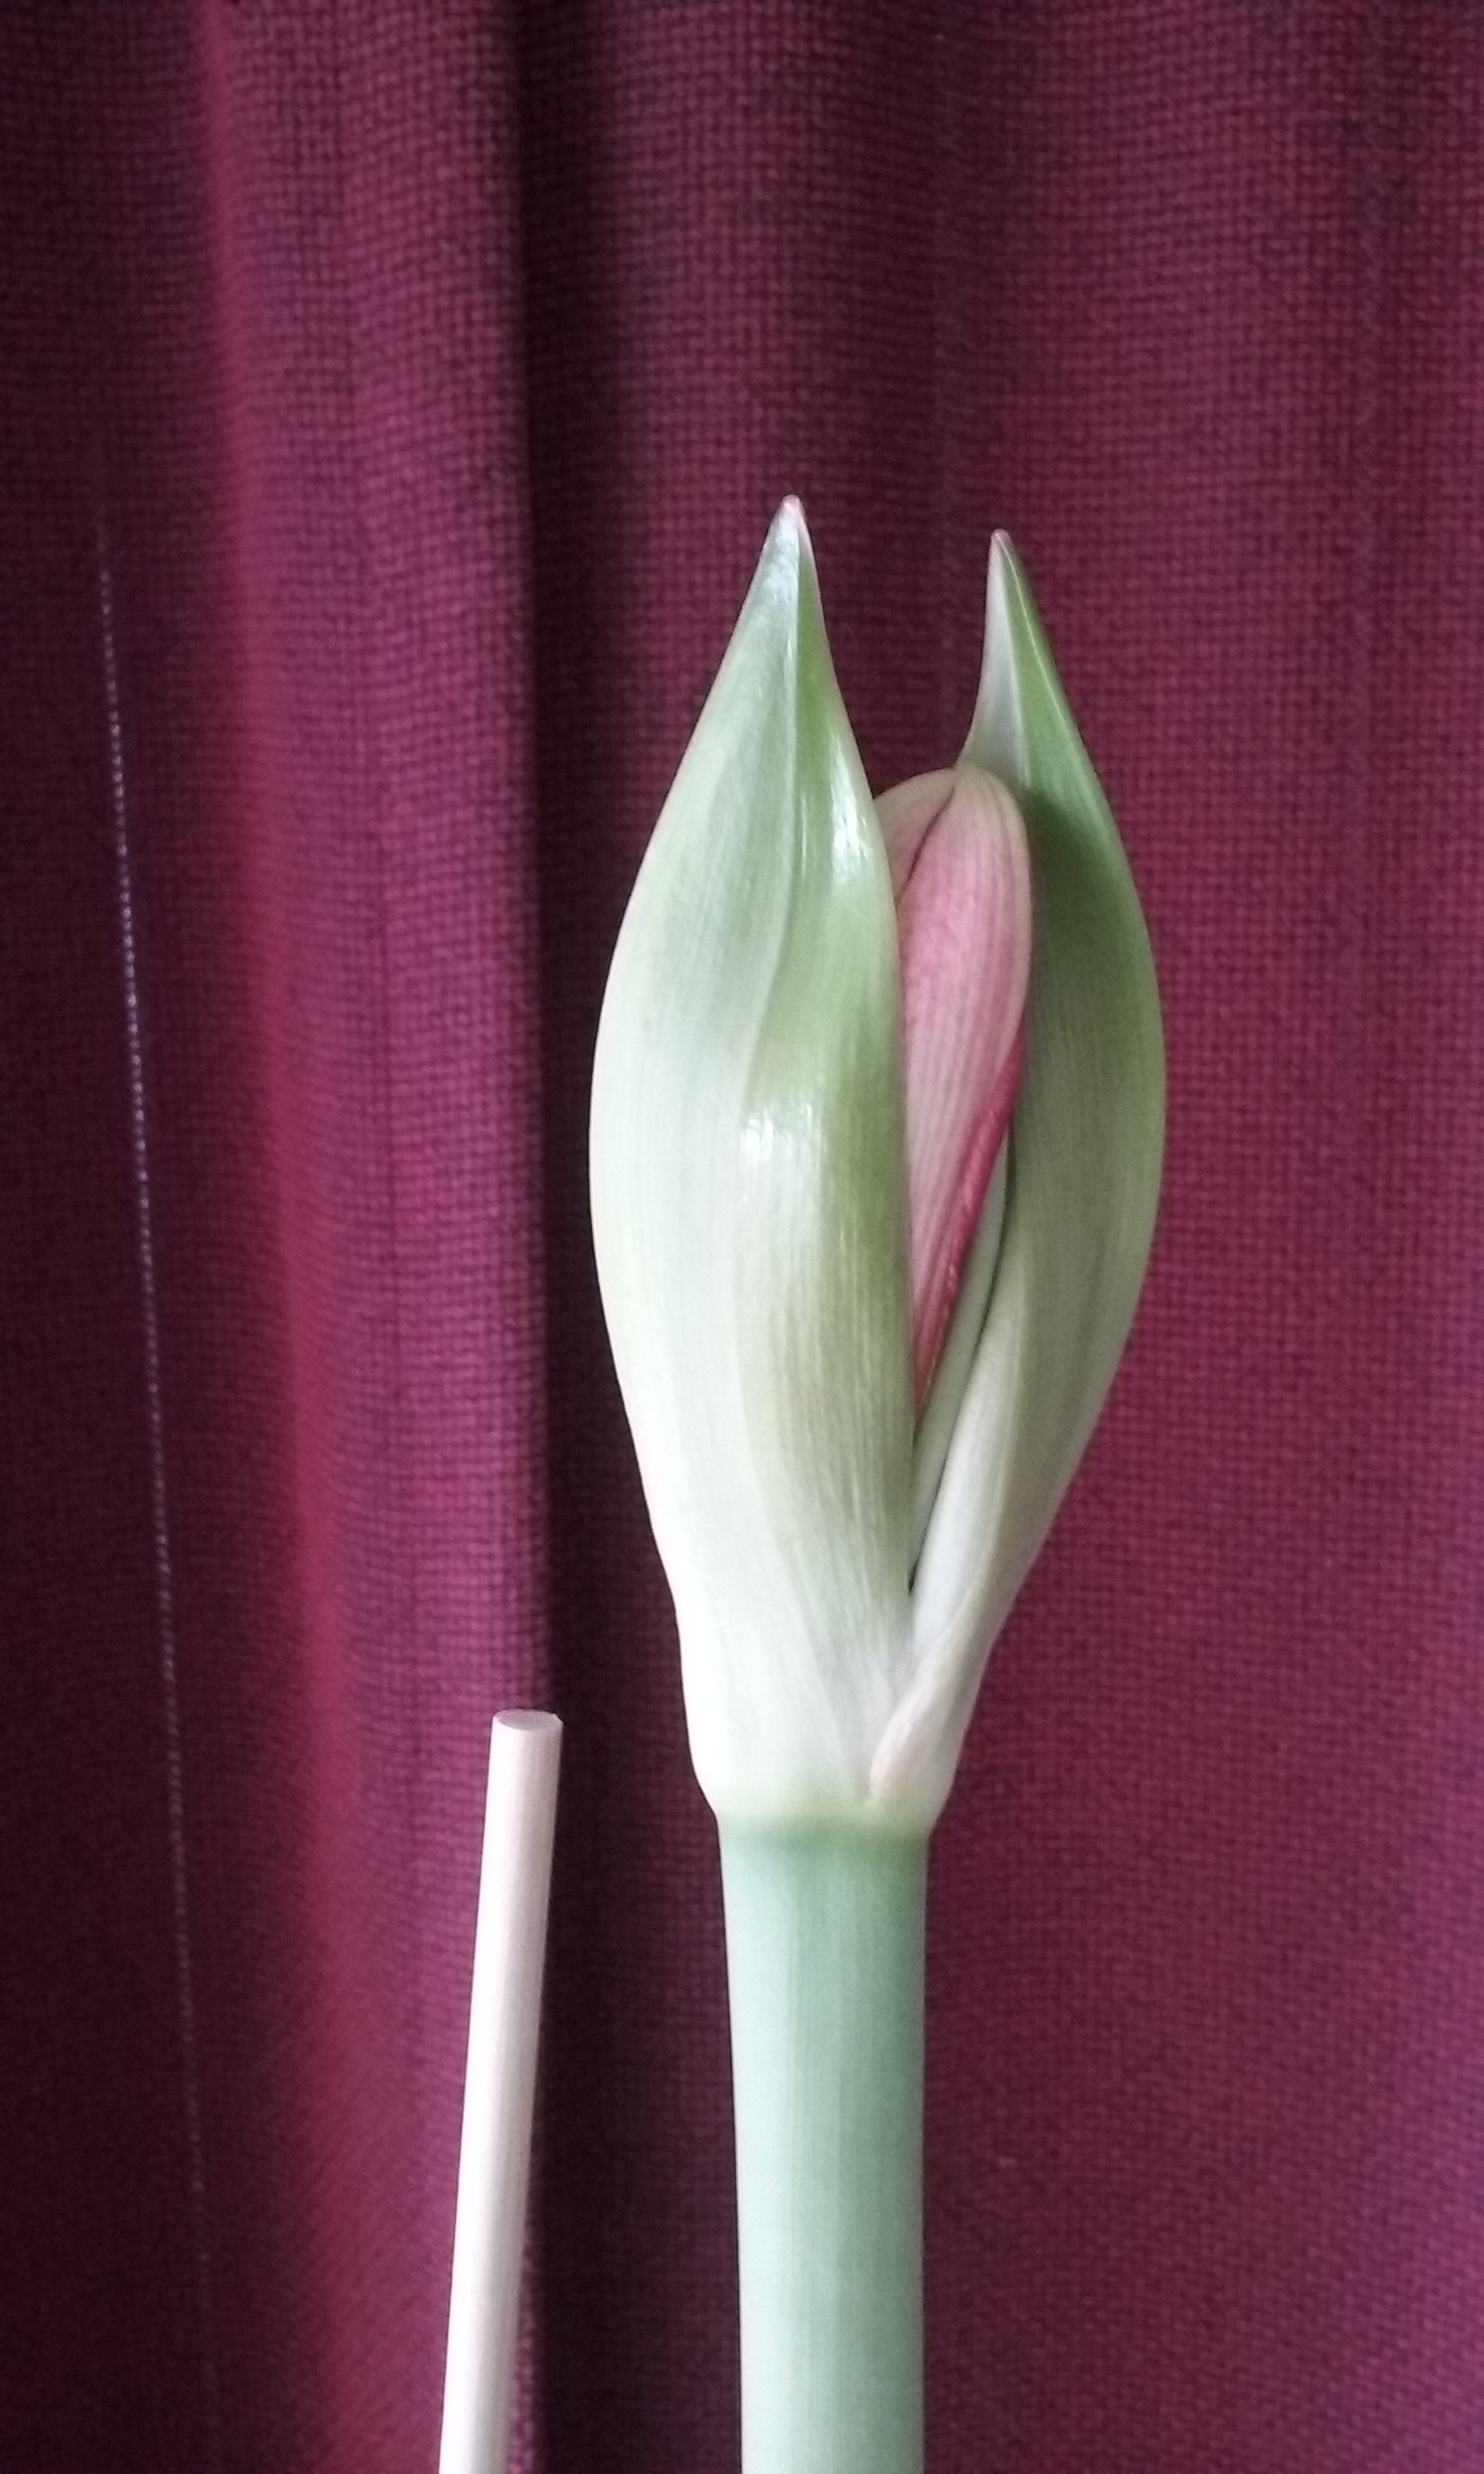
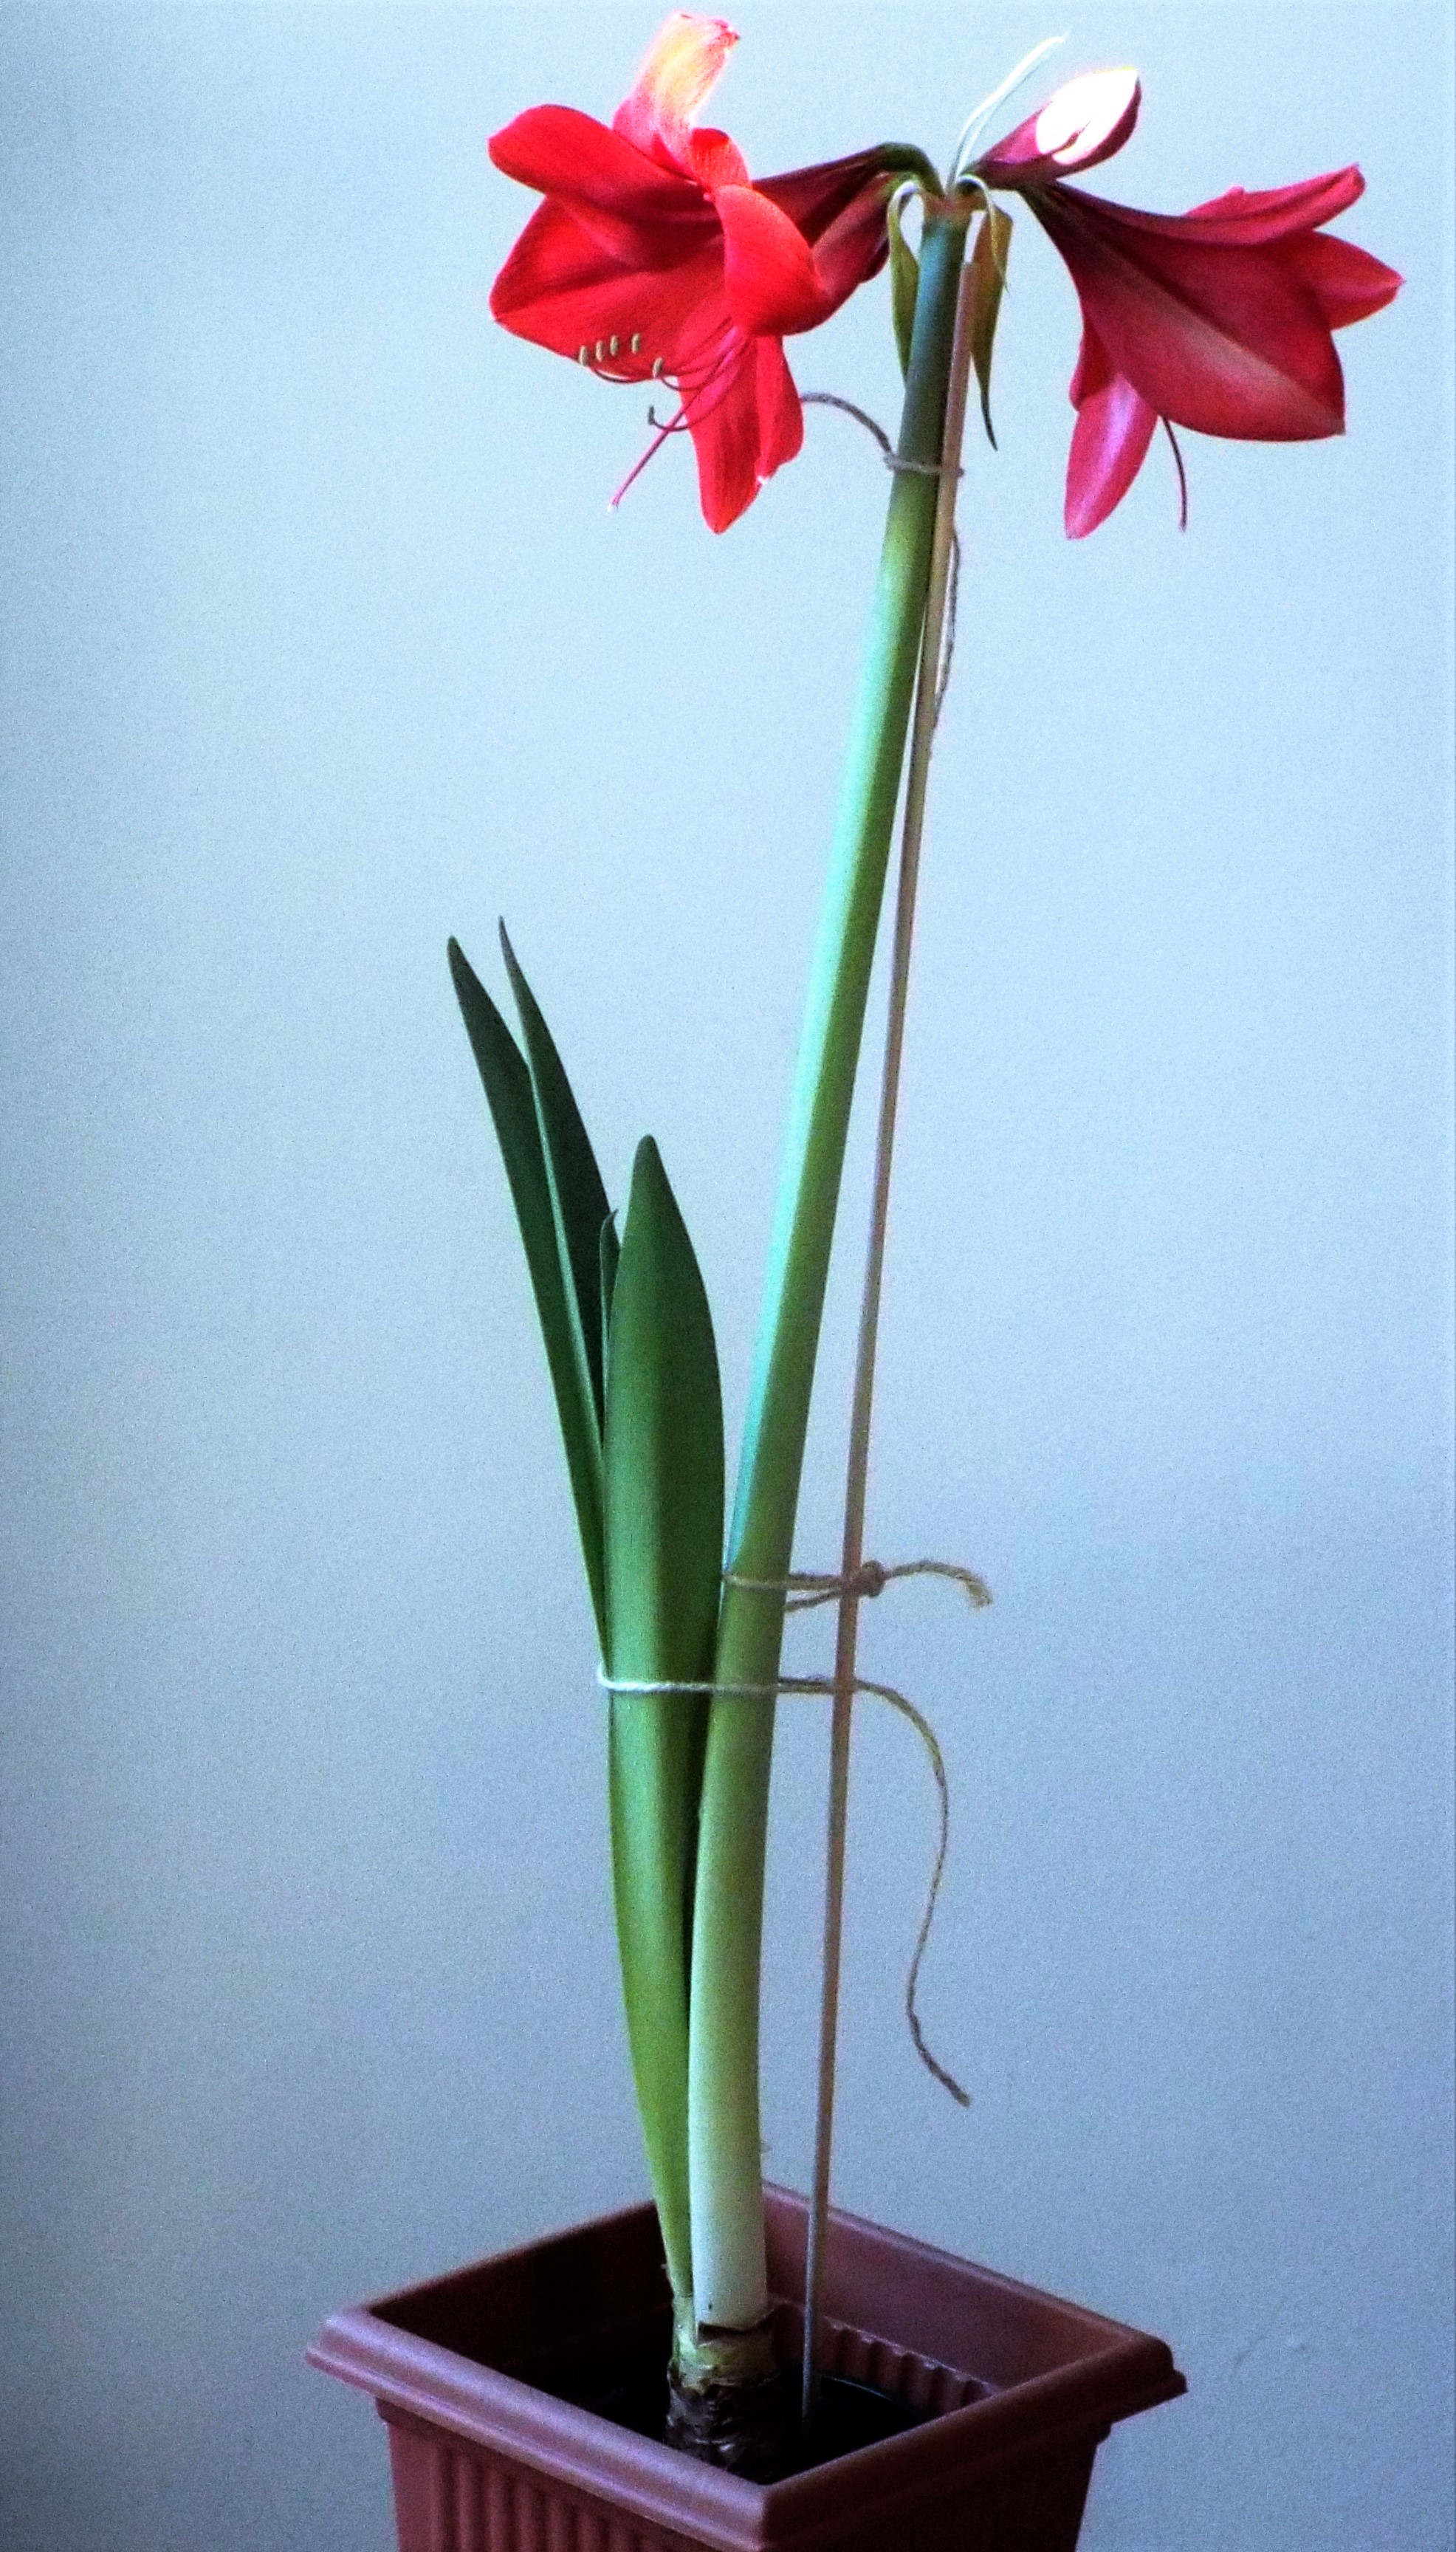
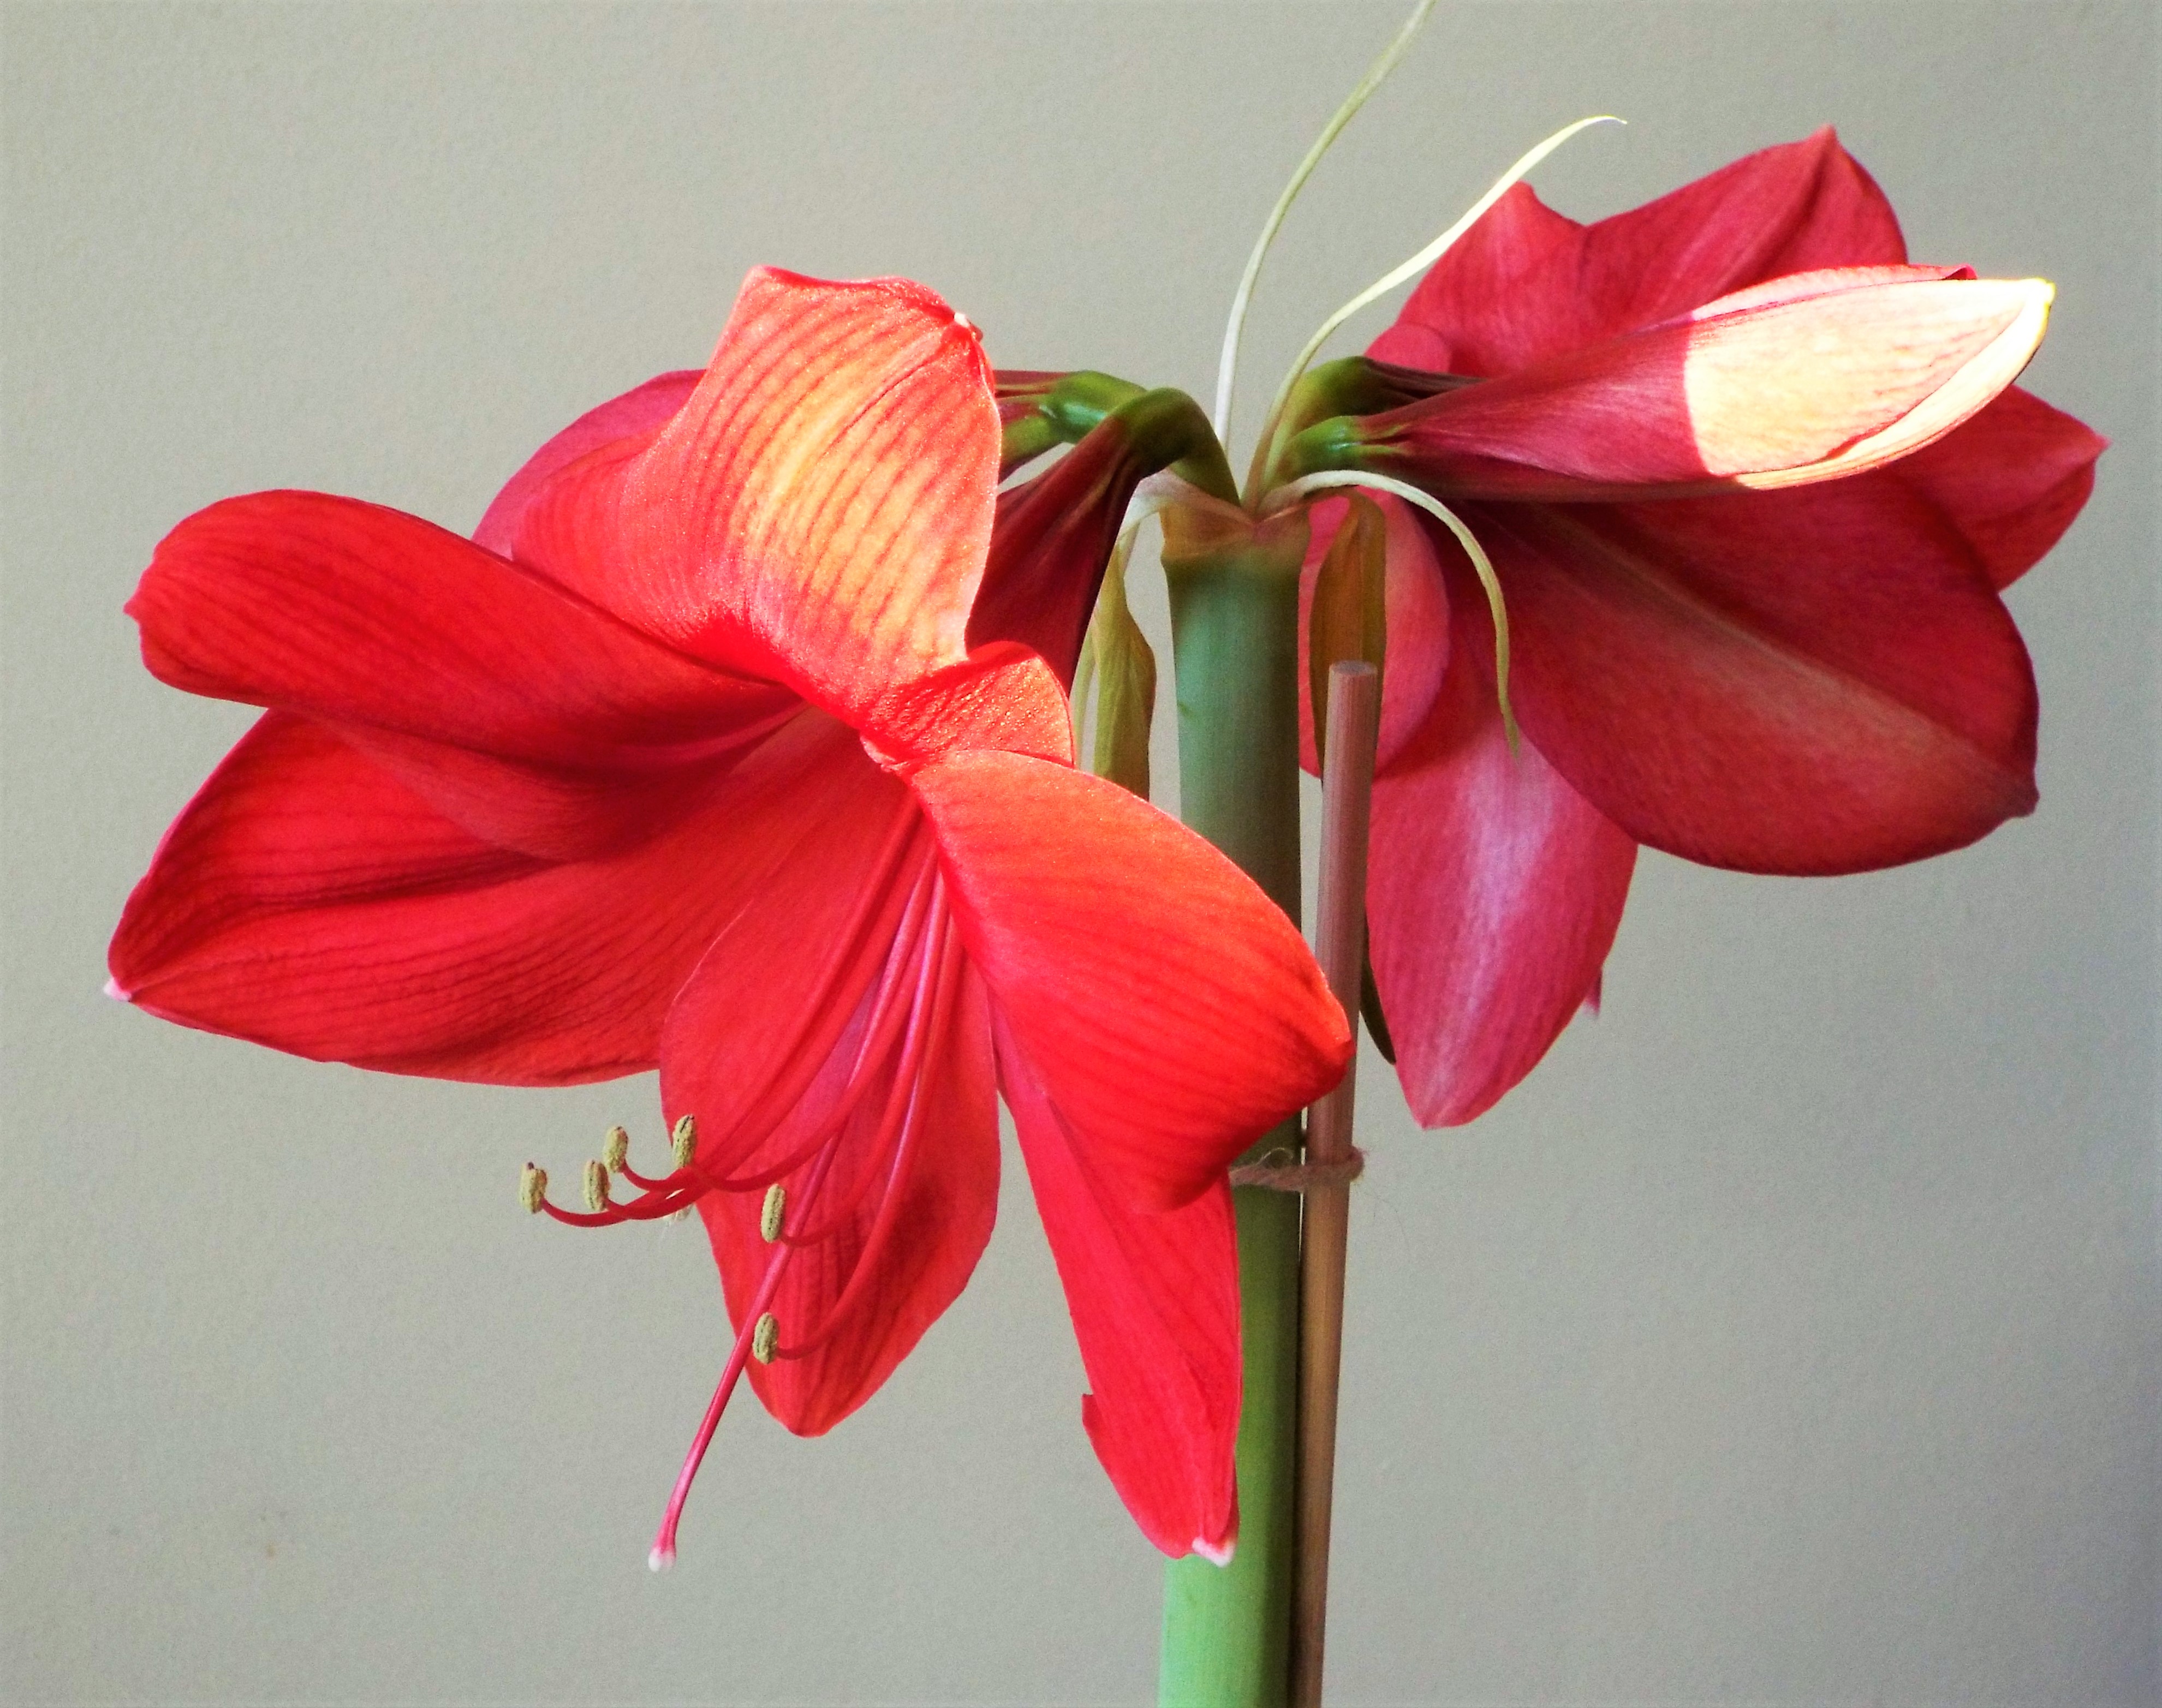
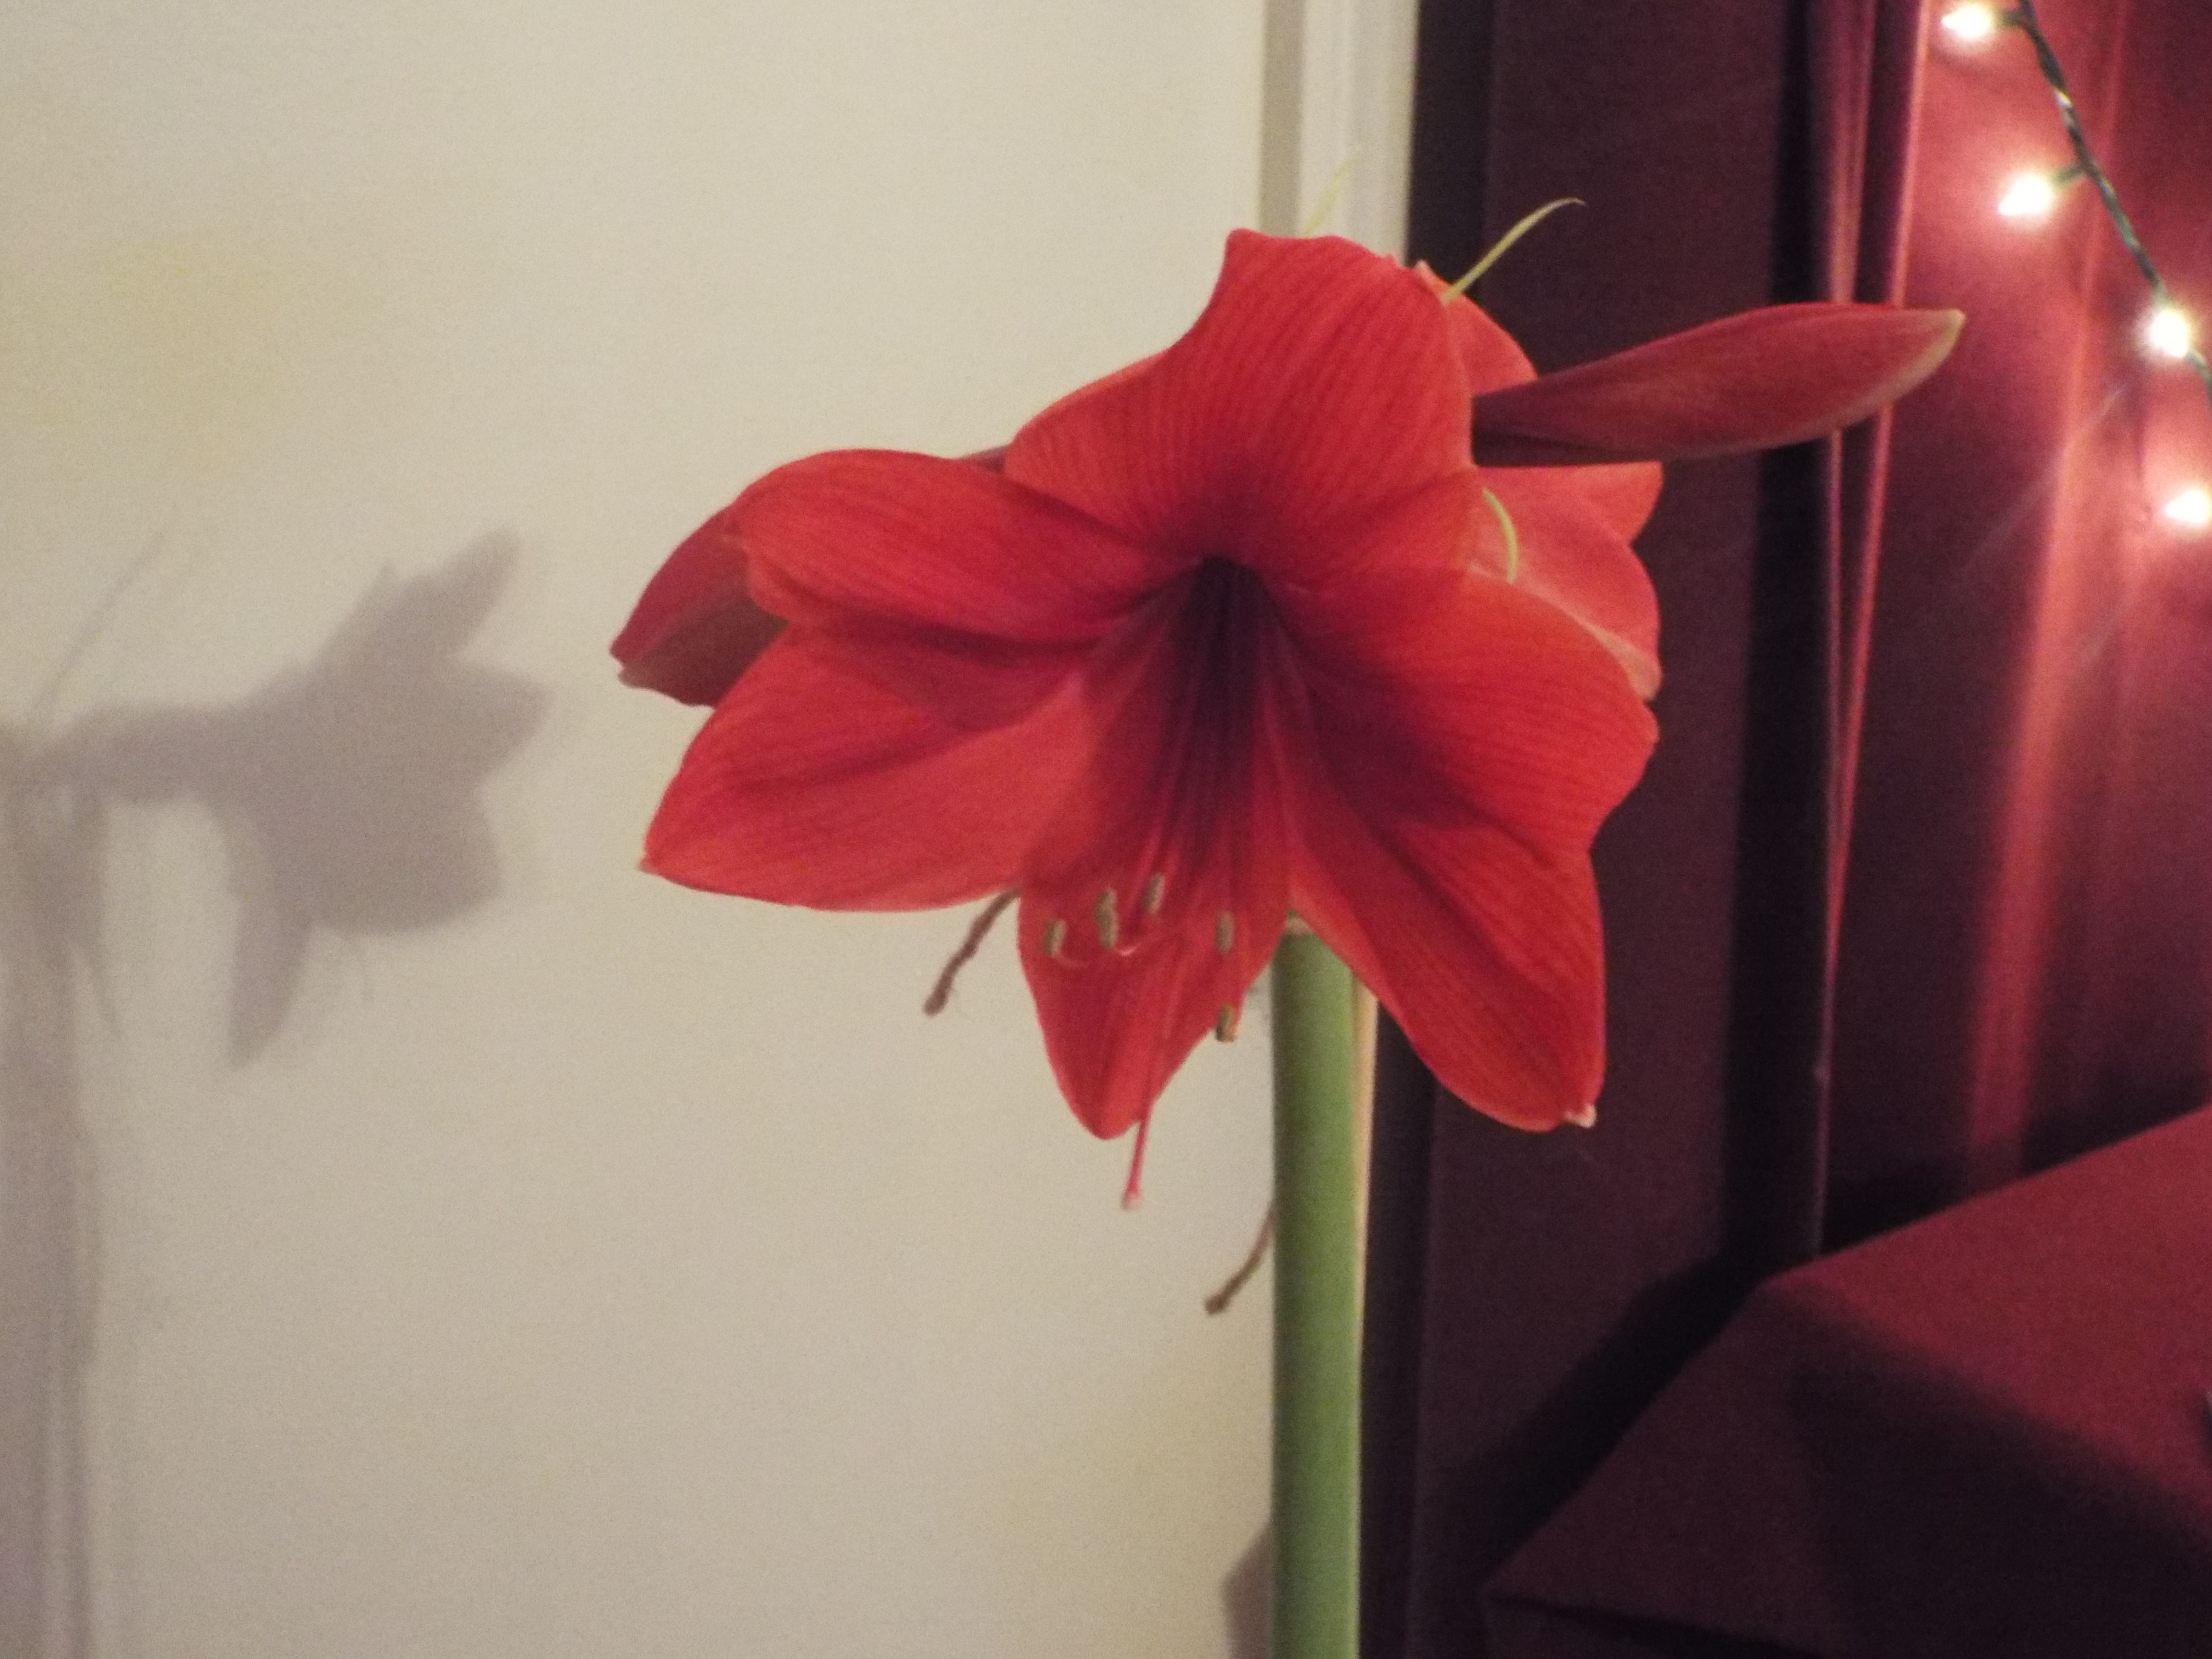
https://funclesarts.com/2015/02/21/oscar-oscar-oscar/

PLANT UPDATE

Our amaryllis plant has really grown and grown.  A fun project for the winter months, we highly recommend planting this remarkable bulb. They are available at garden centers or online.
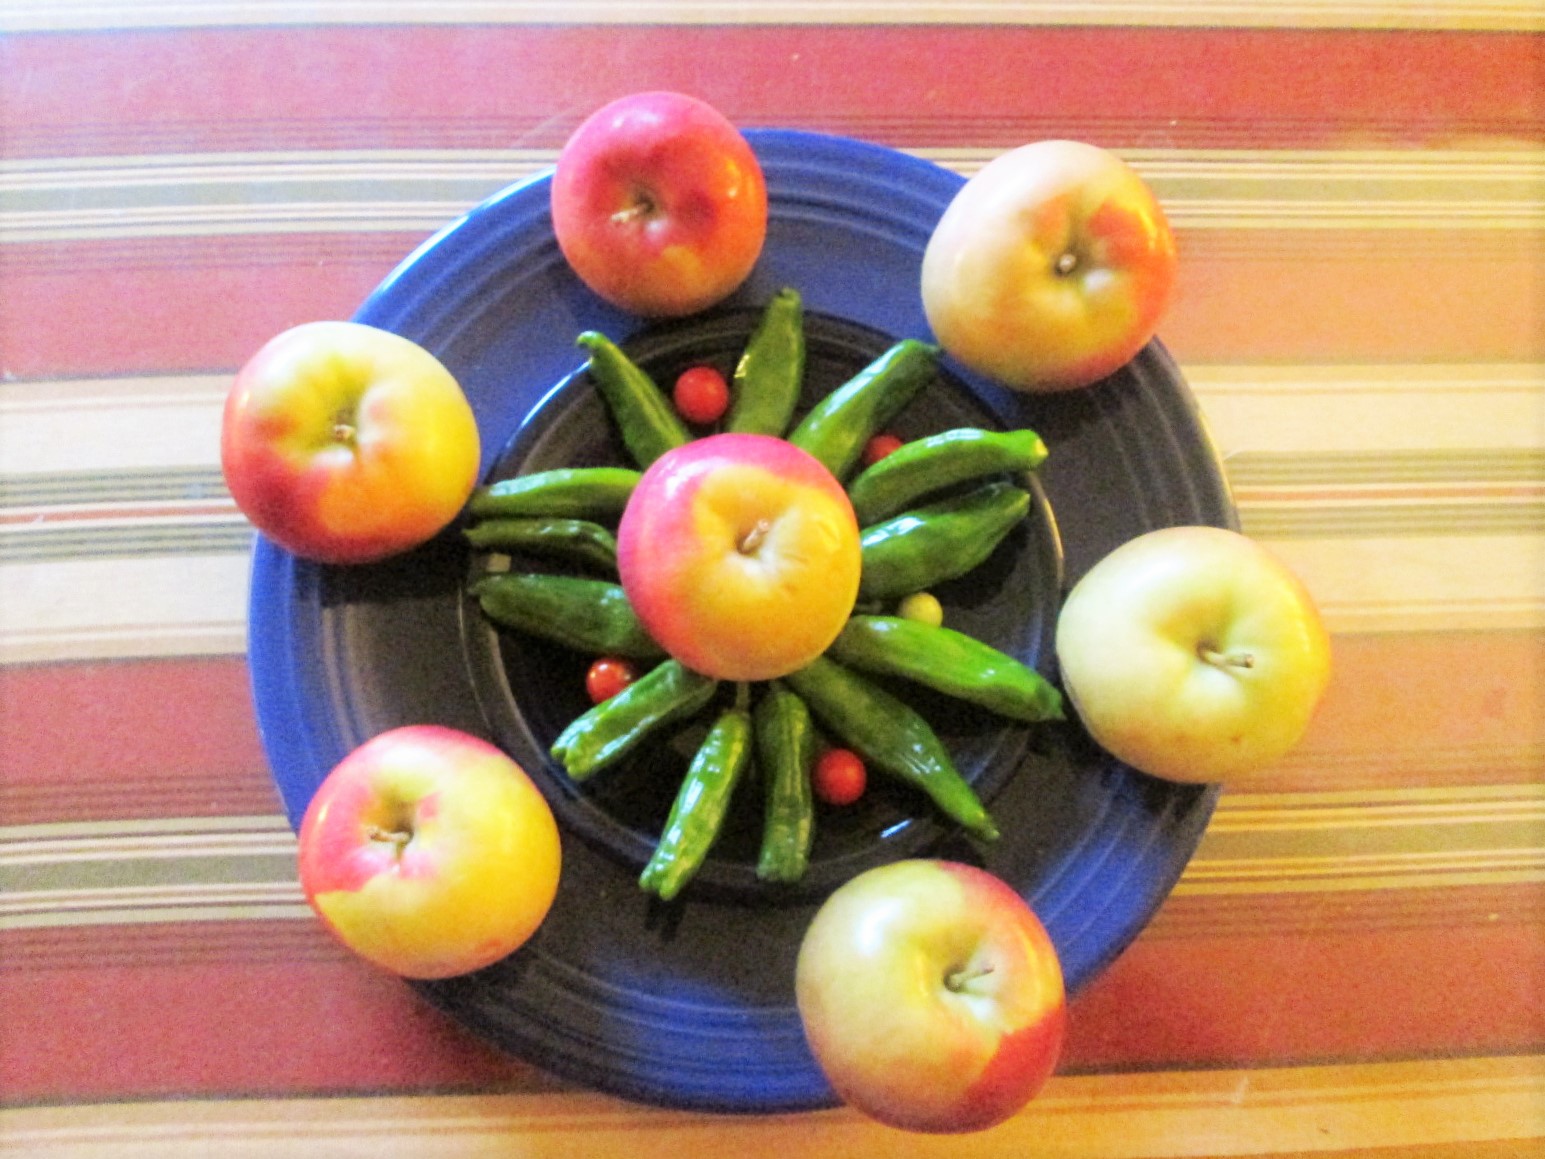
20160221_105551 (1)DSCF2632 (2)DSCF2628 (2)

DSCF2643

FOOD ART

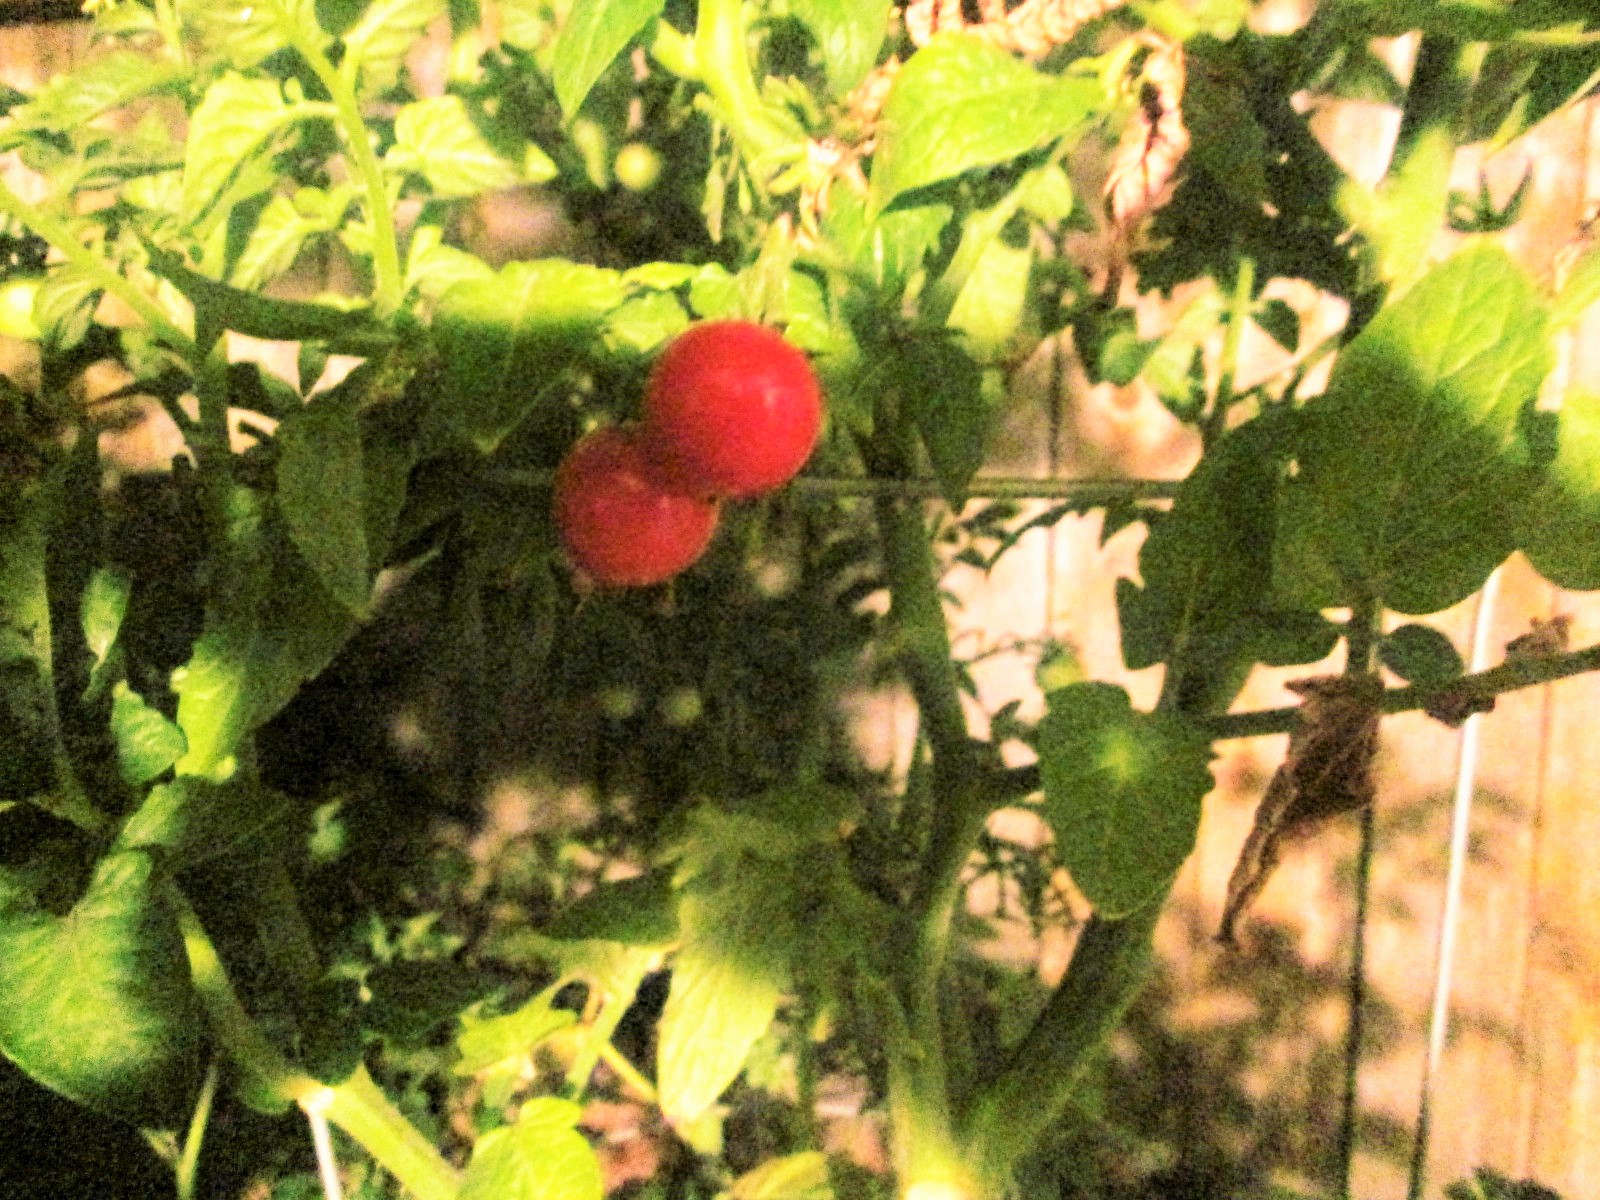
These strawberries have been photo-brightened to look their best, just in time for the Oscars!
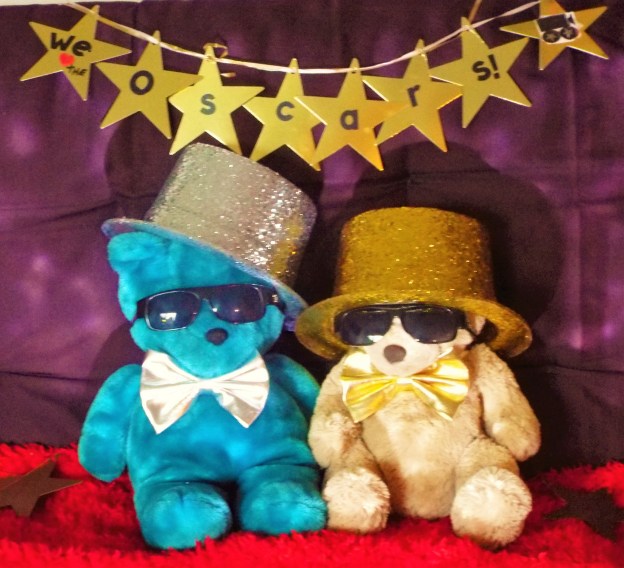
DSCF2649 (3)

THE BEARS

The bears featured at the top of the blog are dressed up and ready for the Red Carpet!

Enjoy!

Roy & Kevin

Advertisement

Fresh and Shiney New Year!!!

“Years end is neither an end nor a beginning but a going on, with all the wisdom that can instill in us. ” – Hal Borland (An author, not a character from TV’s, “Home Improvement”.)

Happy New Year! WOW!!! 2015 is almost over. It’s exciting to celebrate the beginning of a new year! This week, we offer our new dip recipe, which is full of fresh veggies. We also share our creative resolutions, give 2015’s last Patio Update, and, of course, check out the bears in their celebratory mode! As a bonus, we’ve included three more dip recipes from earlier blogs and instructions for our Happy New Year banner, featured with the bears above.

FRESH VEGGIE DIP

Everybody loves dip, but often they are made with powdered soup mixes, filled with dehydrated vegetables, salt and msg. Freshen things up with our easy and delicious veggie dip!

DSCF1986 (2) DSCF1958 (2)


Ingredients:

  • one 16 oz. container fat-free sour cream
  • 4 oz. room temperature, low-fat cream cheese
  • one small onion, chopped
  • 3/4 cup broccoli, chopped and blanched for 2 minutes, then cooled in ice water
  • 3/4 cup carrots, boiled until tender and diced
  • two medium bell peppers, chopped (we like red and orange, but green is fine)
  • one tablespoon olive oil
  • one clove grated garlic
  • one teaspoon hot sauce
  • two tablespoons lemon juice
  • salt and pepper to taste

How to make:

  • Saute peppers and onion in olive oil for three minutes.
  • Sprinkle grated garlic over peppers/onion mixture and saute for one minute.
  • Combine the peppers and onions with prepared broccoli and carrots.
  • Chill all the vegetables.
  • Place cream cheese and sour cream in food processor and blend until smooth.
  • Set aside 1/2 cup of chilled vegetable combo.
  • Add remaining vegetables, lemon juice and hot sauce to food processor.
  • Pulse until smooth.
  • Add the reserved vegetables to food processor. Pulse 3 or 4 times, leaving some chunks for texture.
  • Chill at least one hour.
  • Serve with chips, crackers or crudite.

DIP INTO THE PAST

Speaking of dips, one is never enough. Here are three other dip recipes we’ve shared in 2015!

 “No Tell” Queso Dip

https://funclesarts.com/2015/01/25/a-super-bowl-dip-lights-and-a-recycling-tip-now-thats-poetry/

Red Pepper/Chickpea Dip and Rosemary White Bean Dip

https://funclesarts.com/2015/07/02/lets-be-independent-together/

CREATIVE RESOLUTIONS FOR 2016 

Our goal for this blog is to explore many creative avenues, and in doing so, to learn and have fun. Here are some of our creative resolutions for 2016:

Experiment with new foods and recipes.

See more plays, movies and concerts.

Learn to use our new guitar and camera.

Make more creative gifts.

Go to more galleries and art shows.

Meet more creative people.

Expand on the creative things we already do or have done.

Try new things.

Please share your creative resolutions for 2016!

PATIO UPDATE

This has been a wonderful year for our patio garden. We grew a few plants from seed and tried and succeeded at growing some new vegetables and herb plants. Our patio’s use was extended with real and artificial decorations into the holiday season and will continue to be a source of light and color this winter. Thank you for your continued interest in our patio updates. Looking forward to a green, colorful 2016!!!

This week brought the first snowfall (our favorite snowfall – didn’t have to shovel!) and it looked nice with the greenery on the patio.

DSCF1938 (2)

FOOD ART

FRESH YEAR!

DSCF1989 (2)


QUOTE OF THE WEEK

Every time you tear a leaf off a calendar, you present a new place for new ideas and progress. – Charles Kettering

NEW YEAR’S BANNER

Check out the link below from last year’s blog to make the banner featured above. Easy to update with a quick change of year from 2015 to 2016!

https://funclesarts.com/2014/12/31/happy-new-year/

MORE INFORMATION ABOUT THE HISTORY OF NEW YEAR’S CELEBRATIONS!

This link from History.com is the place to look for New Year’s facts and videos.

http://www.history.com/topics/holidays/new-years

THE BEARS

The bears (featured above) are polished and shining for their New Year’s celebration!!!

OUR WISH FOR YOU IN 2016

We wish you a happy, healthy, fun, creative and prosperous 2016!

Enjoy!

Roy & Kevin!

Pre-Thanksgiving Fun!

This week, try our turkey chili, and check out our decorations, gift ideas, garden update, and, of course, the bears!

TURKEY CHILI

DSCF1319 (2)

This easy, money-saving chili recipe makes a big batch and stretches a pound of ground turkey or beef. It’s a warming, make-ahead meal and leftovers freeze great, too! You’ll gobble it up!

Ingredients:

  • one lb. lean ground turkey
  • one large onion, chopped
  • one tablespoon minced garlic
  • one tablespoon olive oil
  • three 15.5 oz. cans each of black beans and red kidney beans, drained and rinsed
  • one 16 oz. can fat-free refried beans
  • one 28 oz. can crushed tomatoes
  • one 10 oz. can diced tomatoes with chilis
  • two cups water
  • one quart box (32 oz.) of reduced sodium chicken broth
  • one lb. bag frozen pepper strips
  • 1/2 cup chili powder
  • one tablespoon cumin
  • one teaspoon oregano
  • one tablespoon red pepper flakes
  • one tablespoon paprika
  • 2 tablespoons masa flour (in a pinch, finely ground tortilla chips work great, too!)
  • salt to taste

How to prepare:

  • Brown ground turkey in olive oil with chopped onion and grated garlic.
  • In a large saucepan, add the beans, tomatoes, pepper strips, chicken broth and water.
  • Bring to a simmer and add browned meat and onion combo. Add spices and masa flour; simmer for 20 minutes. That’s it!

Serve with tortilla chips, cheese, sour cream, olives and your favorite toppings!

THANKSGIVING DECORATIONS

Thanksgiving banner

This festive banner is fun to make!

IMG_2683 (3)

Check out the directions here:

https://funclesarts.com/2014/11/07/thanksgiving-post-number-one-the-holiday-blogfest-continues/

Playing dress up

Roy’s hand-made scarecrows like to dress up as pilgrims for Thanksgiving!

DSCF1346 (2)

Cards as decorations

We save our holiday greeting cards to use as decorations. This week, they are combined with the leaf print cards we made a couple of weeks ago to decorate a door in our apartment.

DSCF1350 (2)

Check out the blog, “Autumn Leaves”, to learn how to make these leaf prints.

https://funclesarts.com/2015/11/07/autumn-leaves/

GIFTS FOR KIDS

IMG_5873 (2)IMG_5876 (2)

Keeping kids engaged and entertained during holiday celebrations can be a challenge.  For Thanksgiving, we bought the holiday clings on the left so the children can adorn the windows (check with your hostess to make sure it is okay.) Also, nothing beats coloring and sticker books for creative fun. Give Christmas-themed books to the kids at Thanksgiving so they can enjoy them the whole holiday season. Washable markers are the way to go. Kids love to color!

Speaking of color, we are pleased to see our Christmas cacti, a gift from Kevin’s mother several years ago, in full bloom!

DSCF1317 (2)

Hostess Gift Idea: Christmas cacti survive with very little attention and provide the gift of beautiful blossoms at least twice a year.

GARDEN UPDATE

When we started cleaning the patio, it looked like this:

DSCF1304 (2)

After close inspection, we realized that the pepper and 2 tomato plants were ready to go. So thankful for the hundreds of peppers and tomatoes we harvested this growing season!

We kept some of the blossoming plants, which still provide color. The patio is now ready for our winter decor. More to come in future blogs.

DSCF1308 (2)

VEG ART – TWO FOR ONE!

In anticipation of this week’s predicted frost, we picked all of our tomatoes and peppers. They are ripening in a paper bag (great way to hasten the ripening process).

IDSCF1303 (2) DSCF1315 (3)

JOKE OF THE WEEK

Why did the scarecrow win the Nobel Prize? Because he was out standing in the field!             Source:EnchantedLearning.com

THE BEARS

The bears are looking dapper in their mini pilgrim hats!

DSCF1328 (2)

Enjoy

Roy & Kevin

We’ve Only Just Begun!!!

A year ago today, we decided to start a holiday blog and do one post a week from mid-October through New Year’s Day. Once the ball got rolling, we didn’t want to stop. The blog has been a lot of fun to do and it has inspired us to be more creative. Thank you to everyone who has followed and contributed to our the blog. We’re looking forward to another crafty and tasty holiday season and a fun 2016!

PAPER

For wedding anniversaries, the traditional gift for the first year is paper. With that tradition in mind (sorta), we share two crafts made from paper. The first paper project is a clip-on Halloween witch made from construction paper and a clothespin. The second project is a banner we made for Kevin’s brother’s family, wishing them luck on their upcoming move to Florida. Additionally, we offer a recipe for broccoli rabe, a garden update and, of course, the bears!

WITCH CRAFT

Halloween is coming and we are creating a few fun and easy crafts. This week, it’s the cute clip-on witches shown above.

IMG_5638 (2)

You will need:

  • clothespins
  • black, orange, green and white construction paper
  • glue stick
  • double-stick tape
  • scissors
  • a fine marker (black ink)
  • ruler

To make:

Cut the following equIMG_5648 (2)ilateral triangles:

  • three 1-1/4 inch triangles – 1 green (head), 1 orange (hair), 1 black (hat)
  • two 1-1/2 inch triangles – 1 black (dress), 1 yellow (broom head)
  • two 1/2 inch black triangles (shoes)


You also will need:

  • one 3/4-inch x 1-1/2 inch white rectangle
  • one 1-inch x 1/8 inch strip of green construction paper

Draw (as shown in picture below):

  • lines on the white rectangle – every quarter-inch
  • a face on the green triangle
  • a black verticle line on the yellow broom head

A little more cutting (see picture below):

  • cut the white rectangle in half lengthwise to form the legs
  • cut broom bristles 1/16-inch wide ending at the verticle line
  • cut 1/16-inch wide strips in bottom of orange triangle to create hair
  • cut 1/4-inch off the tops of the yellow and black 1-1/2 inch triangles
  • cut the tops off of the 1/2-inch triangles (1/8 inch off the tops)

IMG_5652 (2)

  • attach orange hair to the back of the head with glue stick as shown below.
  • attach shoes to legs and legs to body
  • attach arm to body

IMG_5657 (2)

  • attach head to body and hat to head
  • using double stick tape, attach broom bristle to end of clothespin

Before attaching, the back of the witch should look something like this:

IMG_5659 (2)

Attach witch to clothes pin as shown using double stick tape.

The completed witch will look something like this.

IMG_5663 (2)

DSCF1014 (2)

These witches love to help decorate! Use them to clip Halloween cards to curtains or on our clothesline banner (search previous blogs for info). Looking forward to seeing photos of your witch creations!

This is a simple, kid-friendly craft which is more difficult to describe than to create. Use these basic guidelines and have fun!!!

BANNER  

IMG_5527 (2)

    IMG_5465 (2)                                                                                     

 We designed this special banner by thinking of what symbolizes Florida and came up with the  two obvious answers: oranges and sunshine. We cut out orange and yellow circles to represent  those iconic images. Some quick cuts turned the yellow circles into suns and green leaves attached with small black paper fasteners transformed the orange circles into fruits. Stickers express the sentiment, “Enjoy FLORIDA!”. The banner was strung together using curling ribbon and embellished with sandal and beach themed stickers. (The top of the exclamation point at the end of the banner is a surf board sticker; the paws represent their dog, “Sadie”.)

This was a fun project to create, making use of quality stickers, craft paper, and a new circle cutter. We’ve said it before, but it bares repeating. Always look online for coupons from craft stores (and any stores for that matter). We saved money on all the items use in this banner with just a few minutes effort to print the coupons.

BROCCOLI RABE

IMG_5671 (2)

In our effort to explore new foods, this week we tried broccoli rabe. The first recipe found on- line did not boil the rabe first. It was awful – very bitter! Our second attempt is this recipe from one of our go-to favorites – Rachael Ray. It’s a delicious, healthy way to cook this green.

Here is the recipe:

http://www.foodnetwork.com/recipes/rachael-ray/broccoli-rabe-with-lemon-and-garlic-recipe.html

GARDEN UPDATE 

IMG_5684 (2)

The recent, unseasonably good weather has kept our garden thriving! We have at least 70 green tomatoes on our two cherry tomato plants and 25 peppers in various stages of growth on our Shishito pepper plant. They better hurry up and ripen before this weekend’s predicted frost or we may be growing them in the house. Wonder how much indoor grow lamps cost!

Kevin spotted this lone flower today on the vine that grows on the fence that surrounds our property! This vine has never flowered in our eight years here!

IMG_5678 (2)

VEG ART

The apples have taken over. (No, we didn’t grow them!)

IMG_5688 (2)

THE BEARS

DSCF1002 (2)

The bears are starting to figure out their Halloween costumes!

Enjoy!

Roy and Kevin


MONSTERS, MASH AND MORE!!!


In this blog, we share a monster craft and our tasty reduced calorie mashed potatoes with cauliflower and parsnips and, of course, our garden update.

PAGING DR. FRANKENSTEIN!

IMG_5561 (2)

Halloween is a time when monsters run amuck, but these easy-to-create monsters are fun and functional.

We made these funny monsters with coffee cans, fabric fur scraps and googly eyes. Fun and easy!

You will need: furry fabric; googly eyes; cans, jars, or other containers; craft glue (we use Aleene’s Quick Dry Tacky Glue); rubber bands; felt, pompoms; cloth scraps; construction paper; chenille rope; and anything else that will create the perfect monster!

To Make:

  • Wrap fabric around can and secure at the top and bottom with rubber bands;
  • Glue eyes onto fabric to create face;
  • Add a nose and mouth if desired;
  • For feet, we cut out 2 egg shapes, which were approximately 2 inches by 1.5 iches and glued them to the bottom of the container.

IMG_5567 (2)

  • For the arms on some of the monsters, we used chenille rope found at fabric stores.
  • For the hands, we cut heart sharps from felt or construction paper.
  • Use your imagination and decorate with fabric scraps and whatever you like!

These cute monsters make great vases or containers for candy and silverware for your Halloween parties. Fill one with flowers or candy for a great hostess gift!

MASH

IMG_5537 (2)

We love mashed potatoes, but they have too many carbs and calories. We change them up by  adding cauliflower and parsnips.

You will need:

  • 2 and 1/2 lbs. potatoes, peeled and cut into one-inch pieces
  • One lb. bag of frozen cauliflower
  • One large parsnip, peeled and chopped
  • Butter or margarine
  • 3/4 cup milk

To Prepare:

  • Place potatoes and cauliflower in Dutch oven on medium high heat and bring to a boil;
  • Saute chopped parsnip in butter or margarine over medium heat until tender – 5-7 minutes;
  • When potatoes and cauliflower mixture comes to a boil, reduce heat and cook for 10 minutes. After 10 minutes add cooked parsnips to potato and cauliflower;
  • Cook an additional 10 minutes until tender;
  • Heat 3/4 cup milk until it is warm; milk, butter and salt and pepper to taste;
  • These potatoes are great at this point. But reheated at 350 degrees for 20 minutes and they tasted even better!

AND MORE!

GARDEN UPDATE

Summer-like October weather this week. Garden is looking good and still producing!

Here’s a night shot of our patio. Some of this summer’s favorites – shisito peppers, cherry tomatos and impatients continue to thrive.

IMG_5592IMG_5588 (3)IMG_5589 (2)IMG_5602

VEG ART – Welcome Apple (not the computer)

IMG_5598 (2)

JOKE OF THE WEEK                                                                                                                               What do monsters turn on in the summer? The scare conditioner!                                                source: Halloweenjokes.com

WATCH OUT BEARS – THE MONSTERS ARE COMING! (DONT’T WORRY -THEY HAVE CANDY!!!)

IMG_5583 (2)

Enjoy!

Roy and Kevin


Thanksgiving post number one! The holiday blogfest continues!

Thanks for looking at this blog and at the previous Halloween blog entries. If you haven’t seen the others, please check them out. The fun part for us is creating new things and coming up with fresh ideas every week. This week we show how you can switch things up and make the transition from Halloween to Thanksgiving decorating simple. The Pumpkin About-face Switcharoo takes seconds, and is great for a quick start of your holiday redecorating, and the Happy Thanksgiving banner uses elements of the Halloween banner, for an easy transition.  And it looks great!

PUMPKIN ABOUT-FACE SWITCHEROO! This is a simple trick to switch over from Halloween decorations to Thanksgiving. Simply turn the Jack-O-Lanterns around so the face is toward the wall and the plain pumpkin side faces front. Some of the pumpkins shown above were featured in the 2nd Halloween blog with their smiling Jack-O-Lantern faces. The plain pumpkins are more suitable for Thanksgiving.

HAPPY THANKSGIVING BANNER

IMG_2683 (3)

  • Last week, we showed a Halloween banner made with burlap painted with black paint and hung clothesline style and secured with painted clothespins.
  • This week we used the same lines , hung 11″ apart, one over the other, and added 3 more clothespins (18 total for this).
  • For the letters, we cut card stock into 18 rectangles 4.5″ X 3.5″ and cut capital letters out of contrasting paper. (Shortcut: Using 3 X 5 plain index cards would save cutting time and that size works well too.) We used yellow for the base and purple, red and orange for the letters. We had those on hand. Use your favorite colors.
  • Secure letters with glue stick.
  • For the word HAPPY, we hot-glued plastic leaves to the clothespins.
  • For THANKSGIVING, we used scotch tape to secure leaves to the back and bottom of the card stock/index cards. We did the same on the side of the first and last letter .
  • Adjust and center letters for your desired look.
  • Embellish with turkey, pilgrim, cornucopia, or Thanksgiving stickers if desired.
  • Keep it neat, but don’t worry about perfection, the casual look is part of it’s charm.                   (Hmm.. you may be noticing a pattern here!)

A FEW MORE THINGS:                                               

STOCK UP ON STUFFING! According to livescience.com :                                                   “American’s gobble up 46 million turkeys at Thanksgiving” Wow!

THANKSGIVING JOKE OF THE DAY:                                                                                                          If the Pilgrims were alive today, what would they be famous for? Their age!                Source: enchantedlearning.com

Thank you all for following and sharing these blogs! We appreciate your interest!

More next week, including a great craft project and a simple but surprising twist on a classic Thanksgiving recipe! Check it out!

Thanks again,

Roy and Kevin!

New Holiday Blog Project!

IMG_2640 (2)What’s it all about

We have been thinking about blogging for years. I figured that the holidays would be a good time to start, as we always have lots of creative holiday ideas and there is a lot to write about. With that said, we are launching our HOLIDAY BLOGFEST!! Every week between now and January 1st we will post a blog about the holidays with ideas and other (hopefully) interesting content. Our focus is that   creativity can be simple and affordable and it can make life more fun!

Today we’ll start simply with just a few items:

FIRST HOLIDAY: HALLOWEEN!

Craft tip: The little ghosts shown in the photo above are an easy party favor you can make. Wrap a lollipop with a white napkin. Tie with a ribbon or rubber band, use a marker for eyes, and you have cute ghosts. BOO!

Decorating tip: Tie string to witches hats and hang them from the ceiling!

Hats


FUN FACT: The first Jack-O-Lantern was actually made from a turnip. Source: Randomhistory.com

QUESTION OF THE WEEK: What was / is your favorite Halloween candy??

At Halloween, don’t worry about dusting, think of the dust and cobwebs as free decor!

KUDOS TO: Kevin for taking the great photo of the pumpkin on the stairs in Provincetown fall of 2012. ( shown above)

A BIG THANK YOU to the Warwick RI Public Library and wonderful  instructor Reza Clifton for the great blogging  and social media class they presented.